

How do I import my contacts data?
The system allows you to import contacts with the help of the bulk import option so that you don't have to add each contact manually. Just enter your information into the appropriate fields, and the system will upload all your contacts at once.
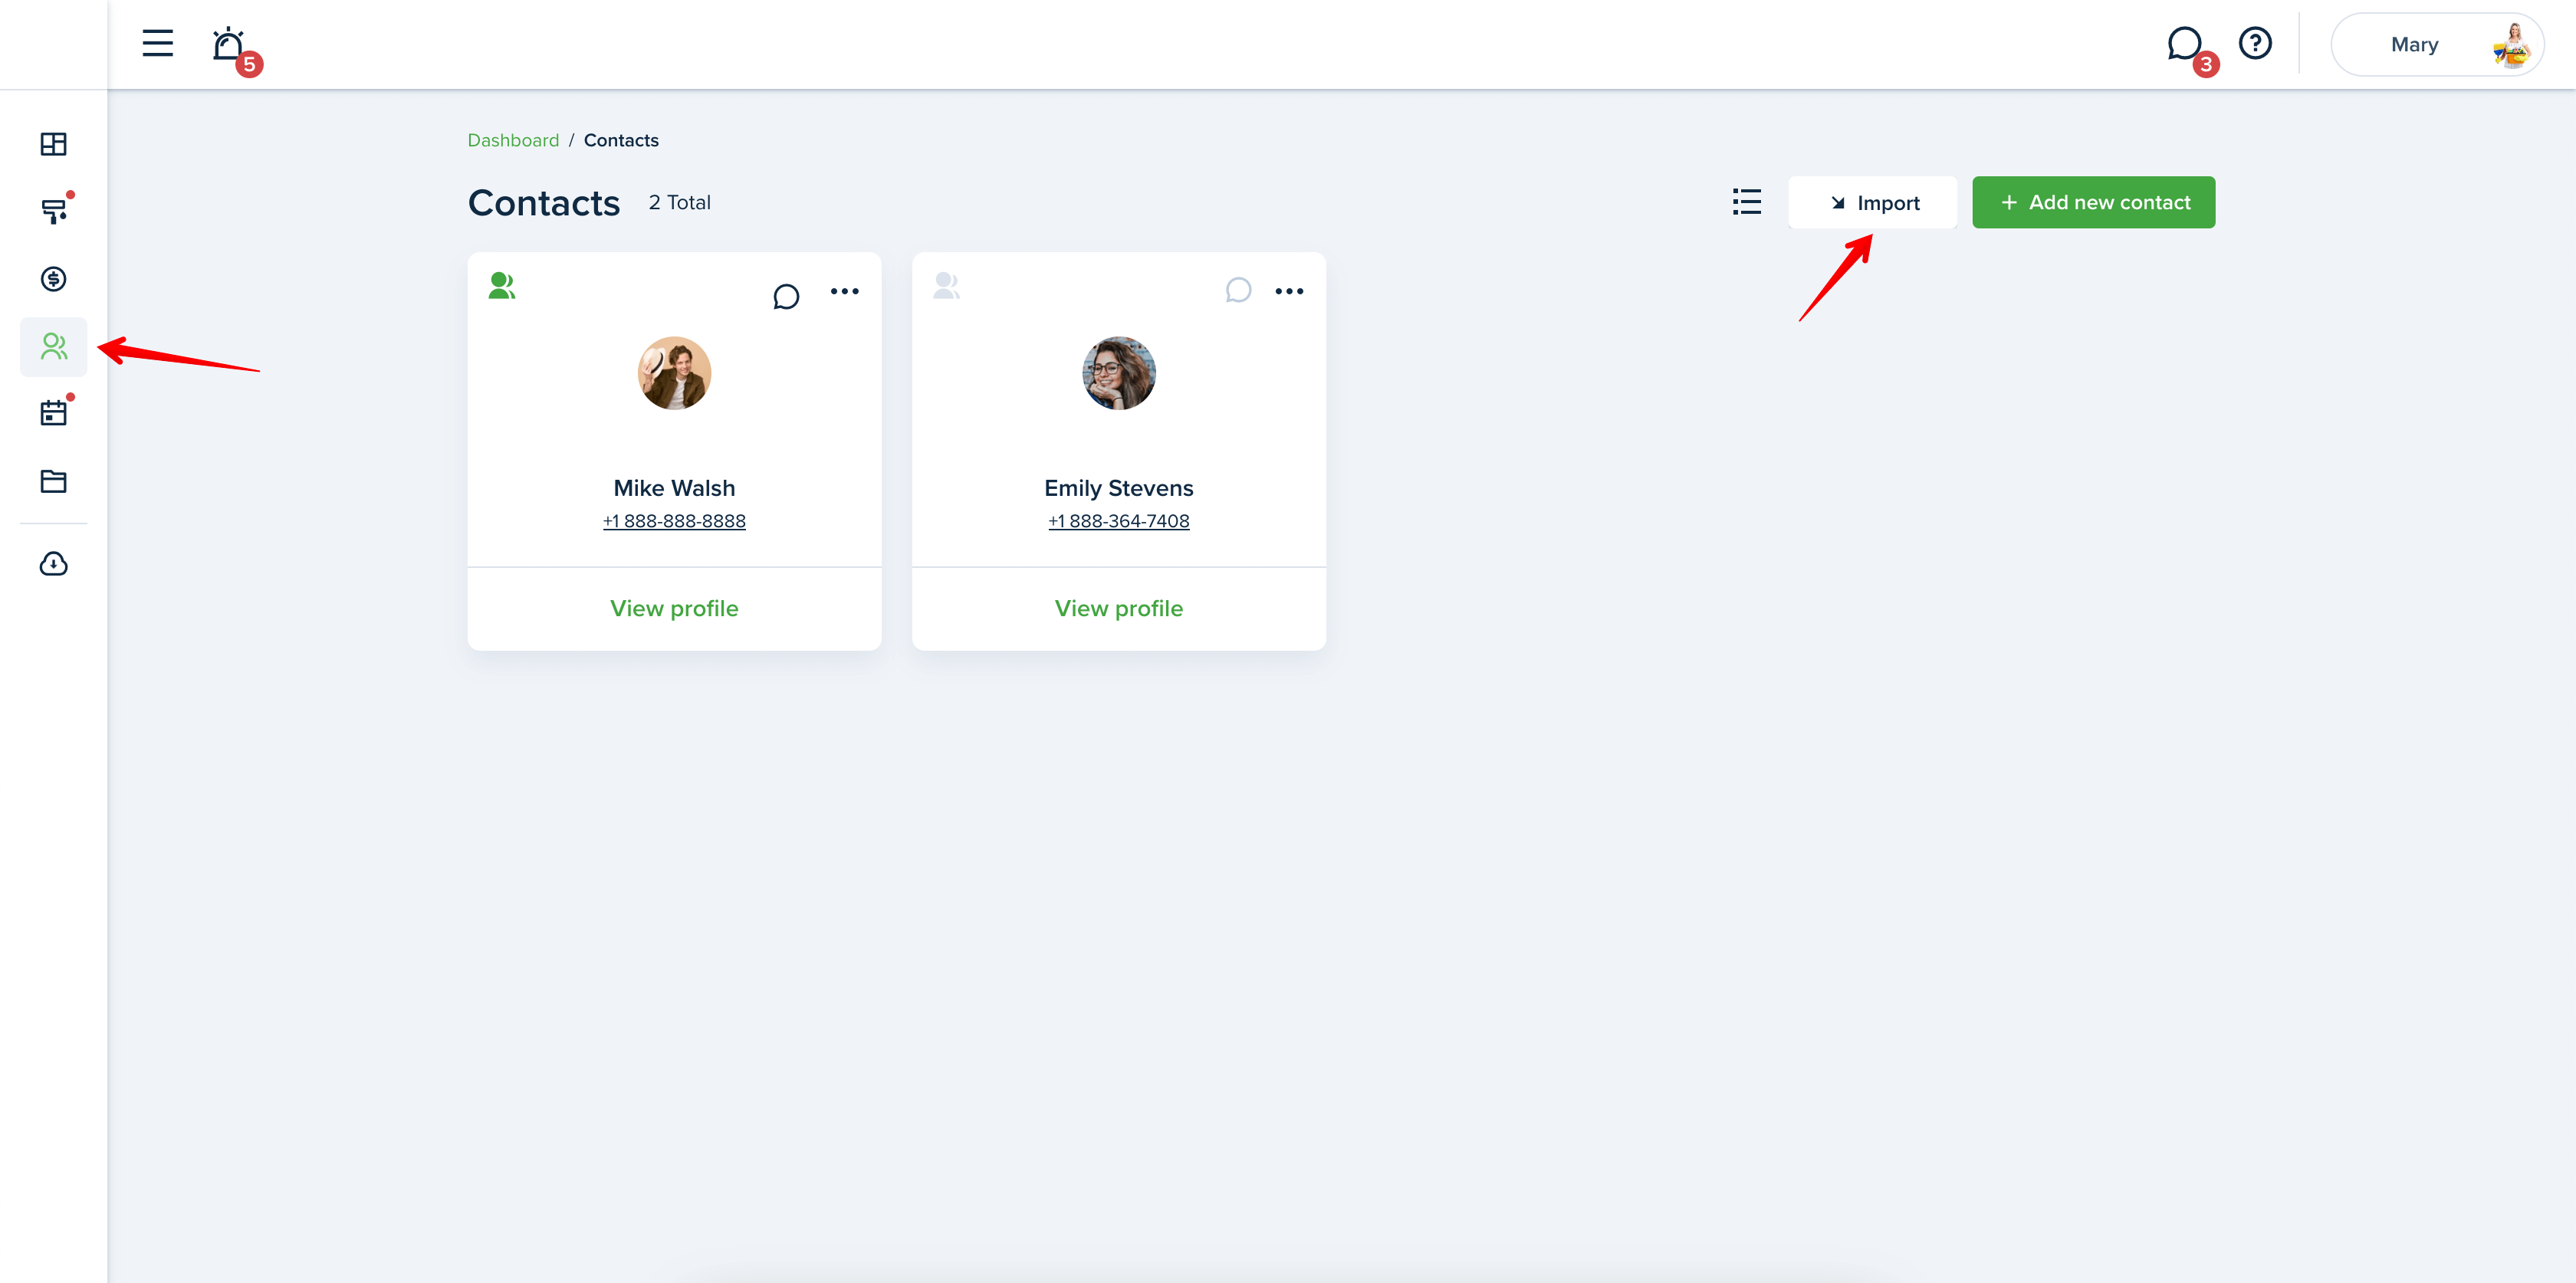
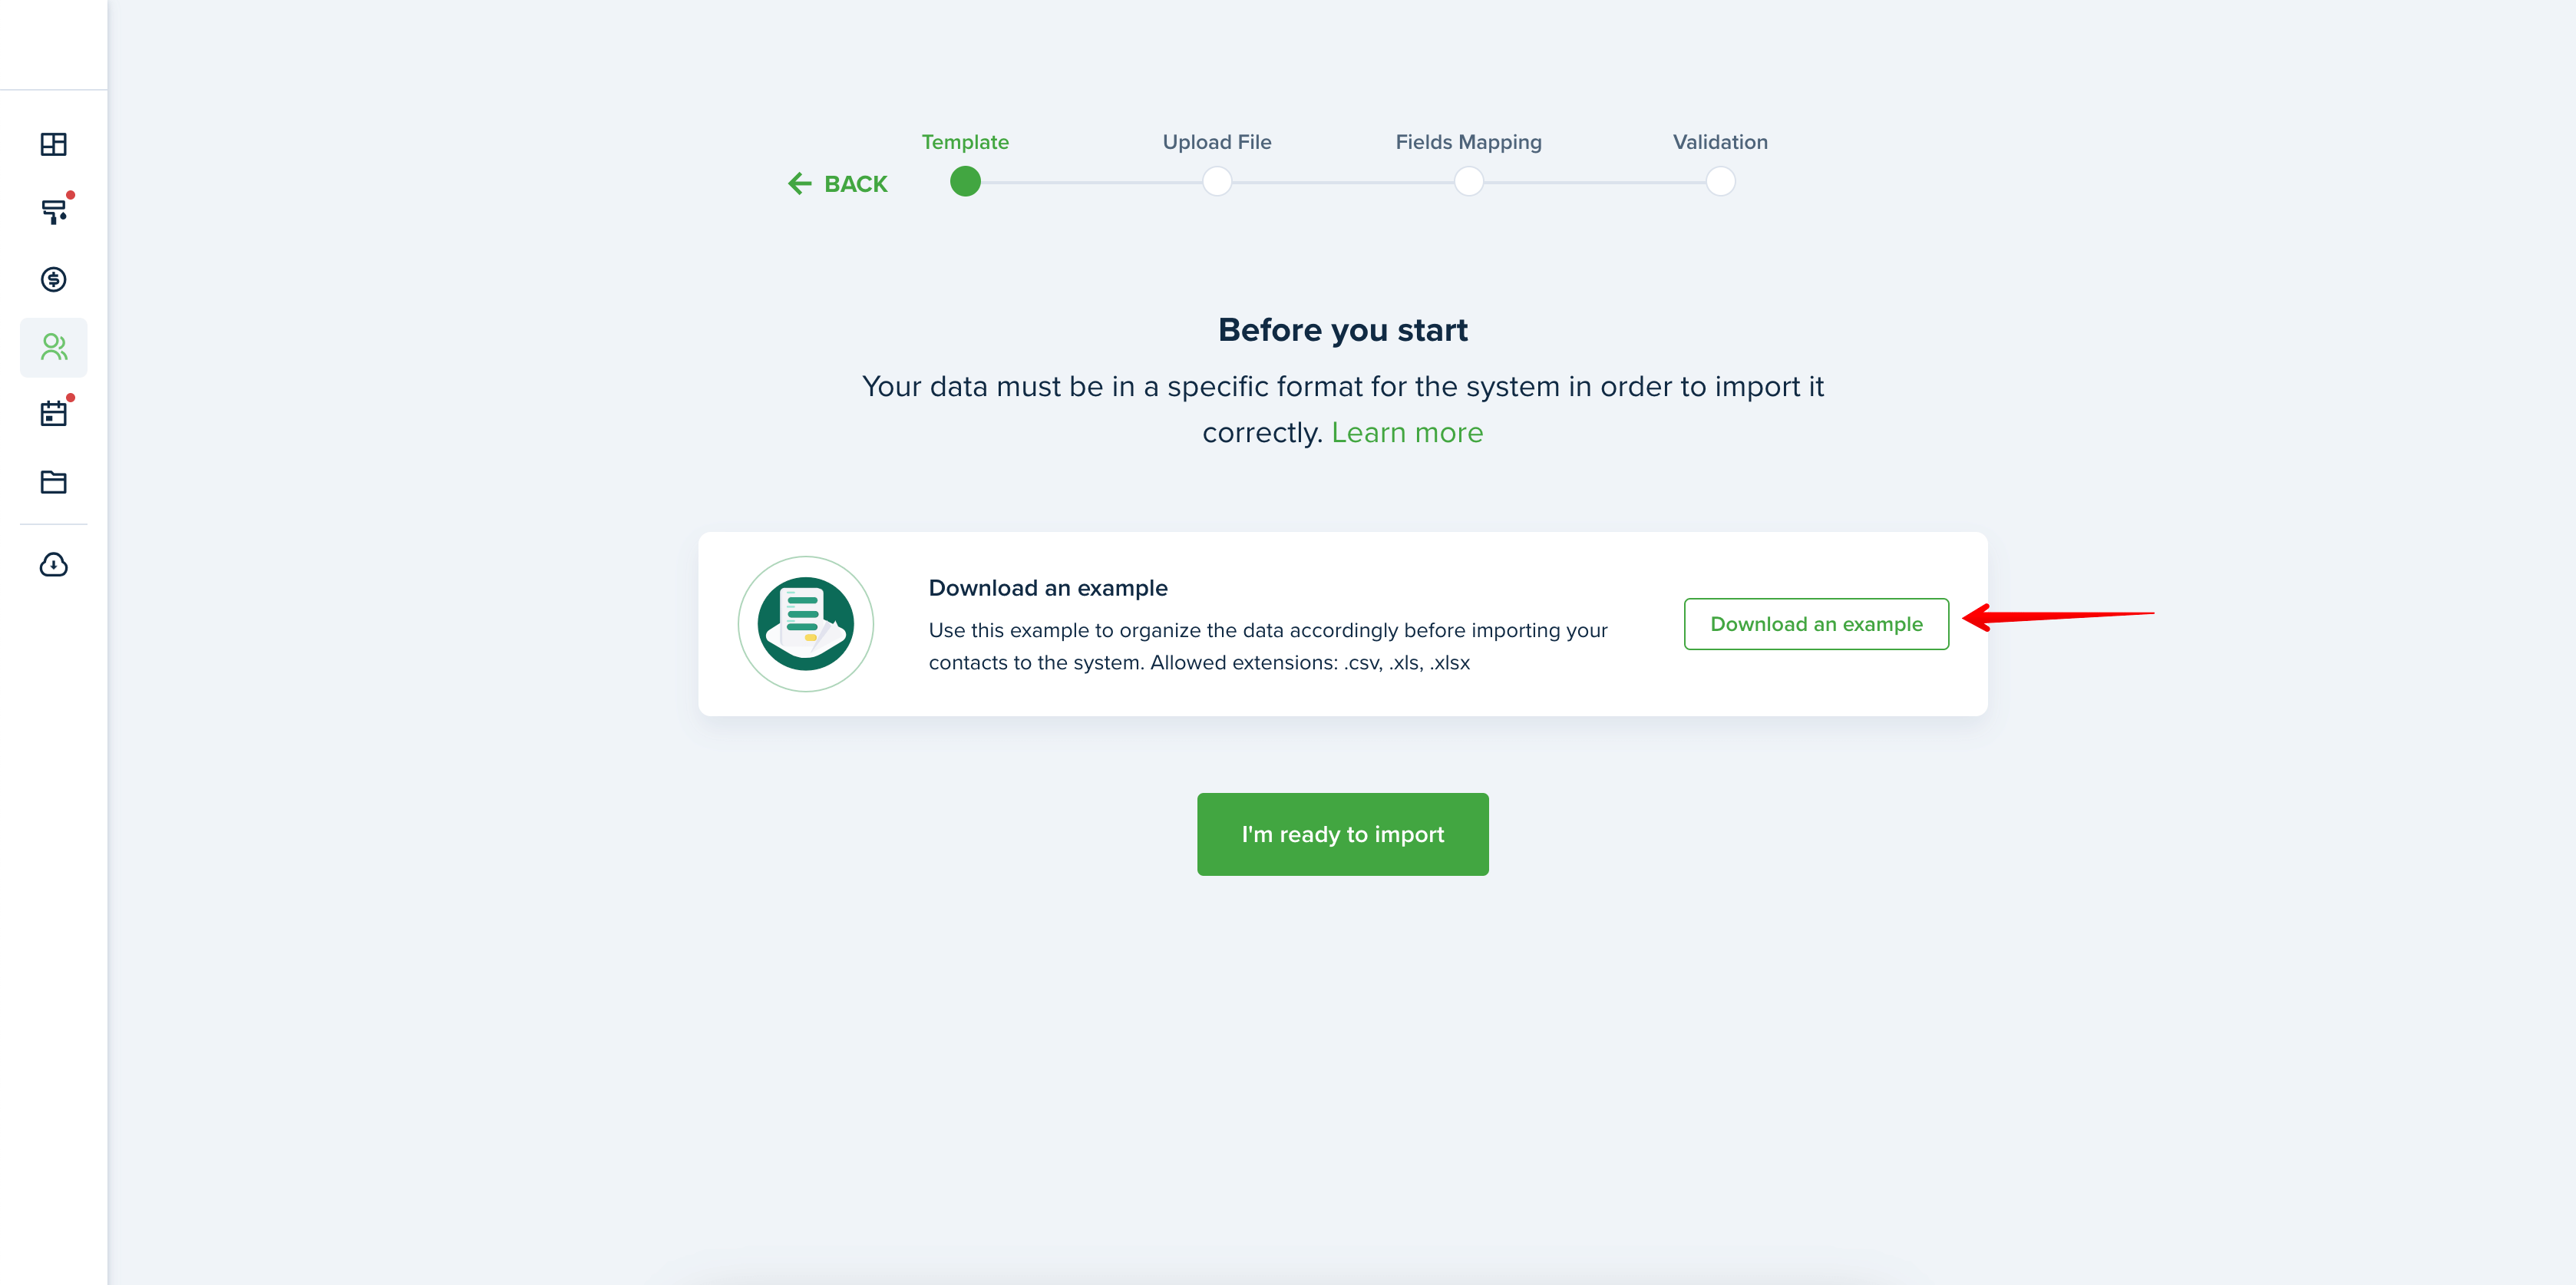
Go to the “Contacts” page and press the “Import” button. Then choose “Download an example” option:
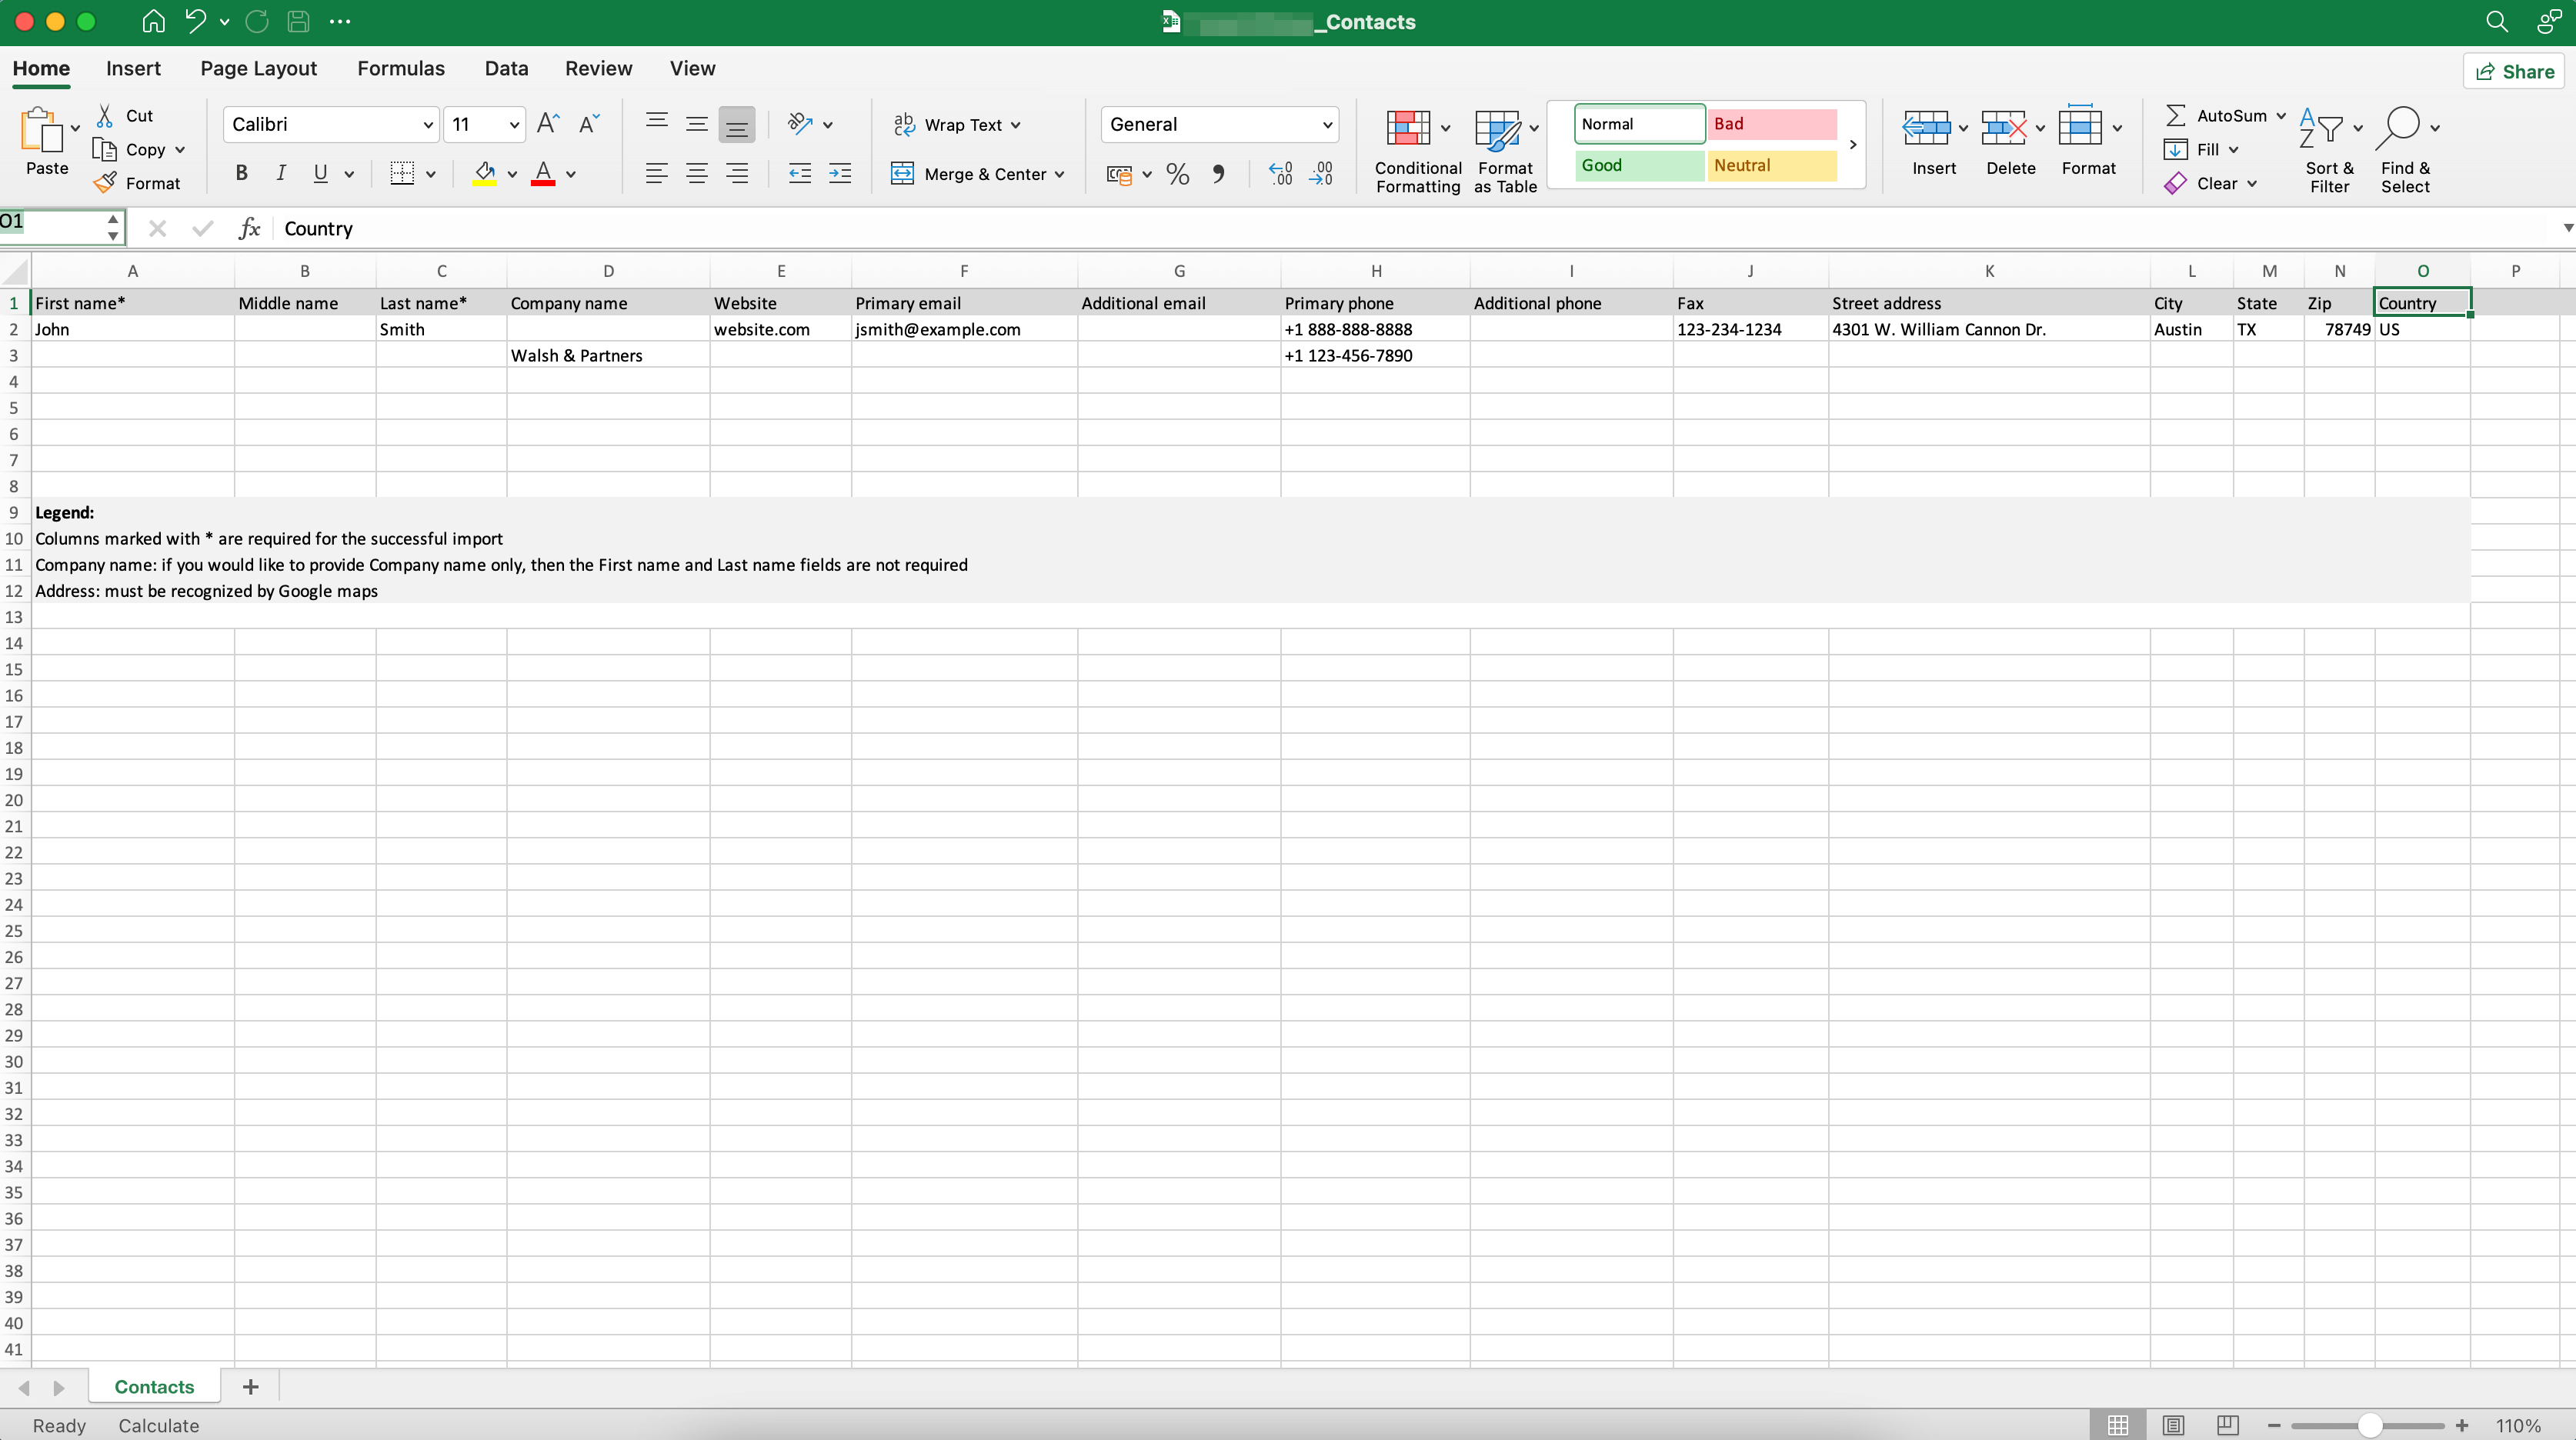
Please fill out the sample fields as shown in the screenshots below.
Contacts import:
Please note!
For landlords, the required fields are First and Last name. If you don’t have this information, the company name can be added in a separate field.
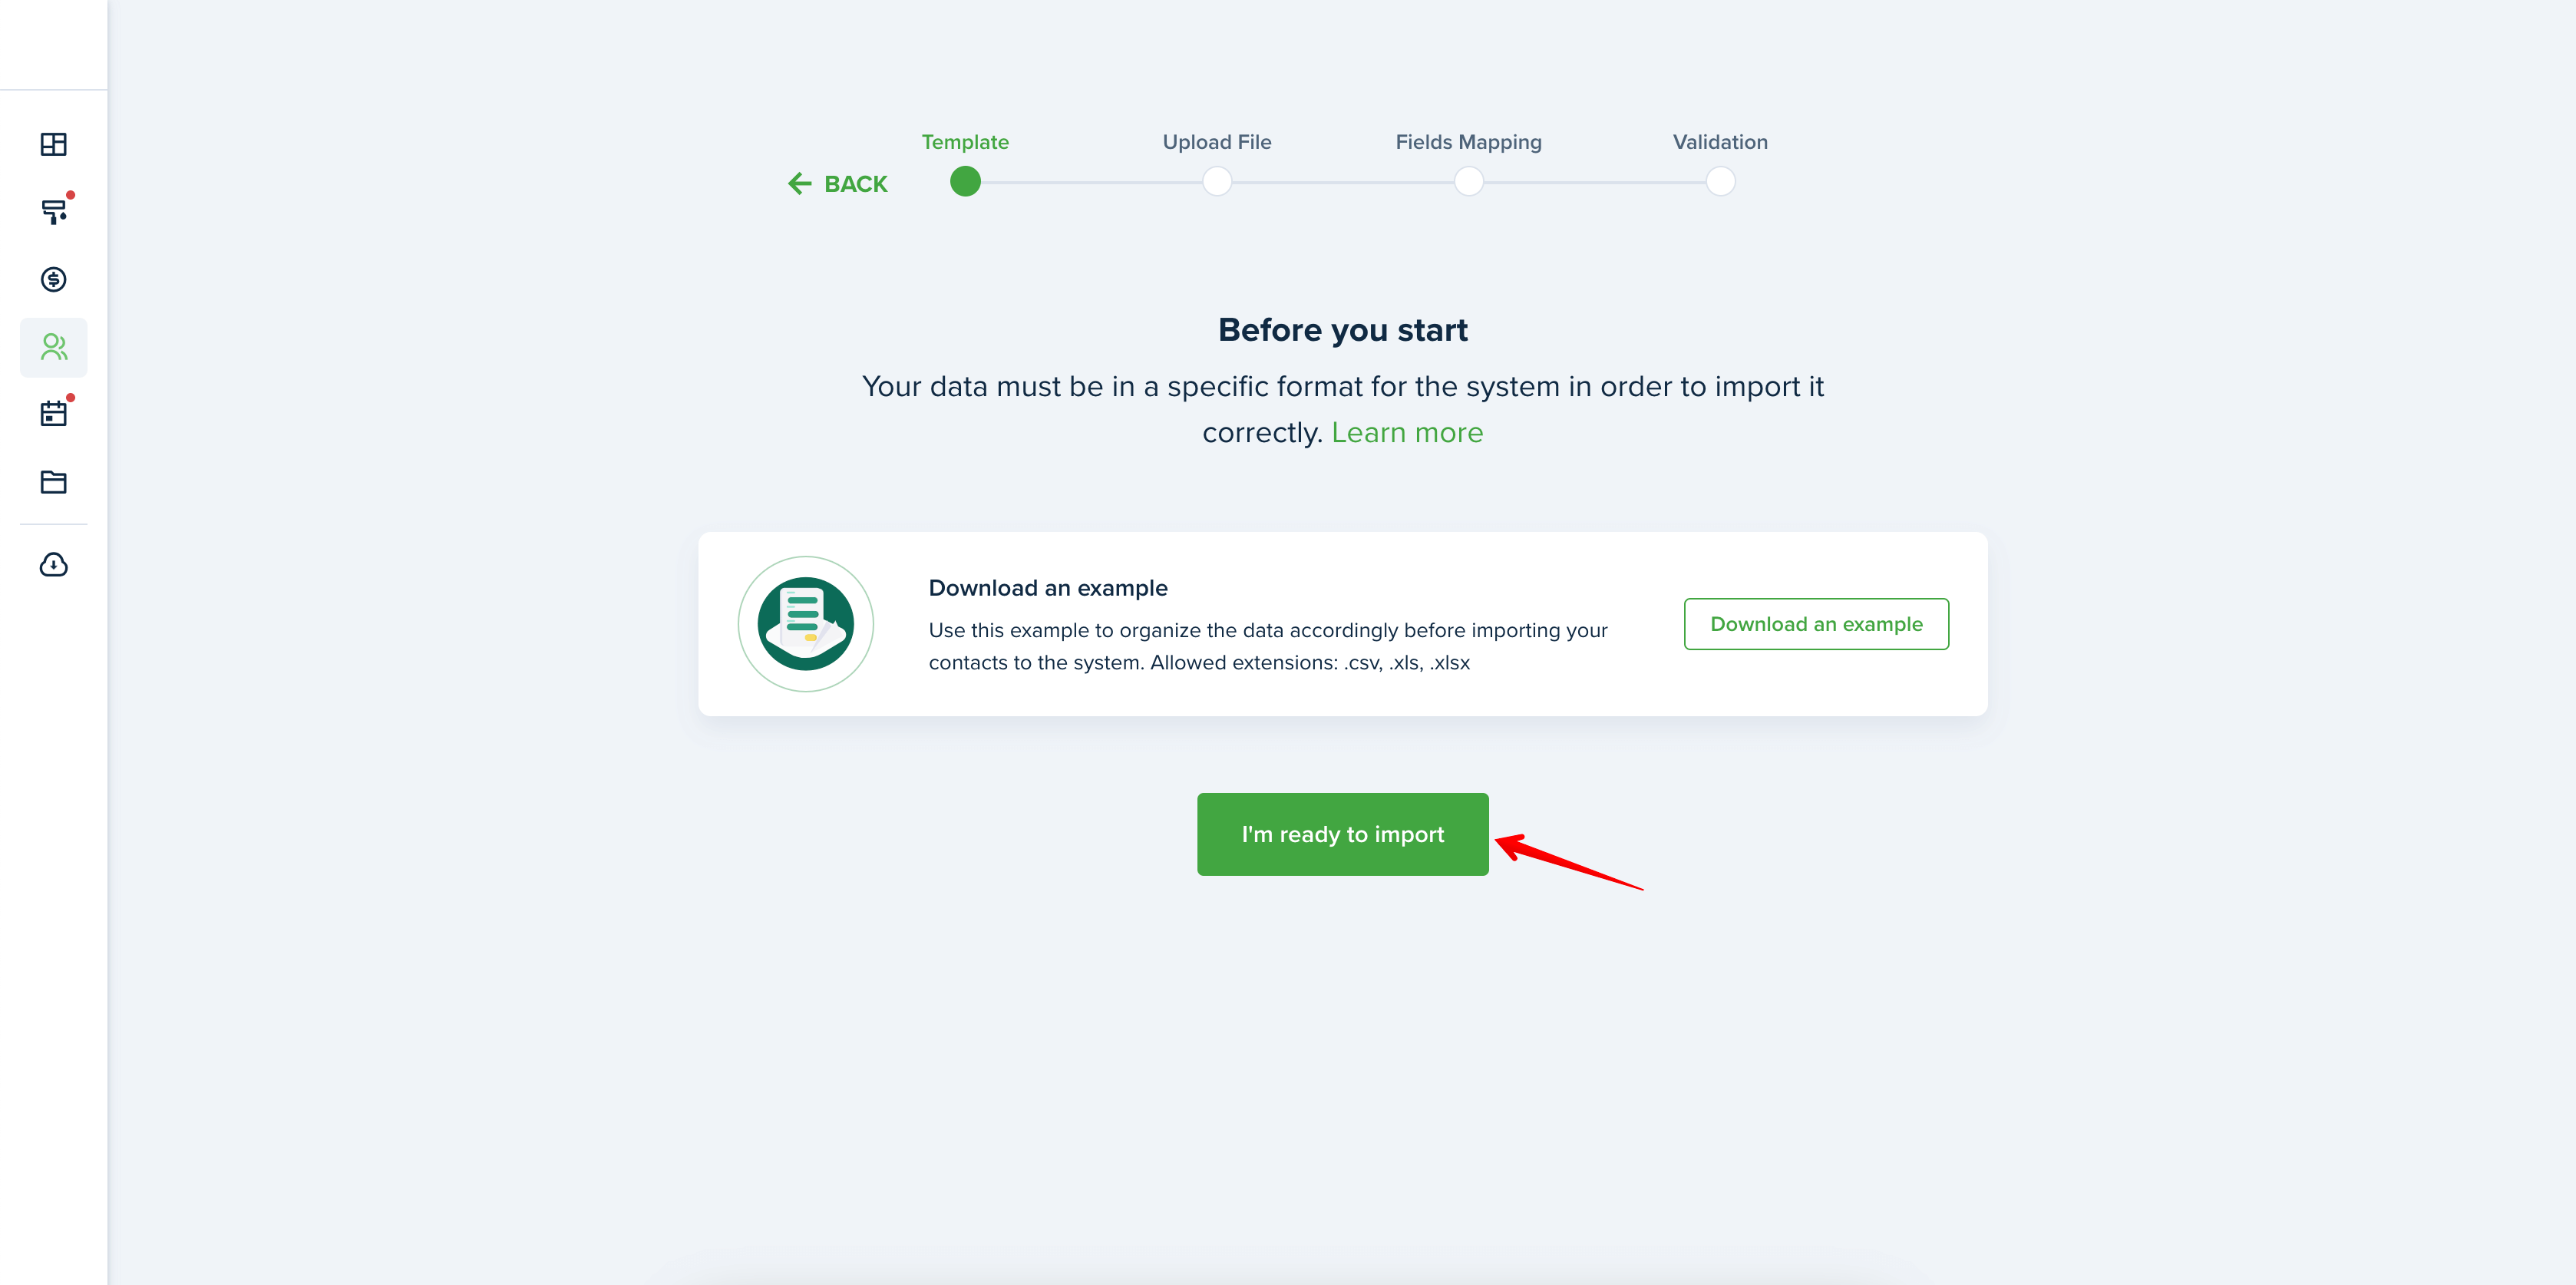
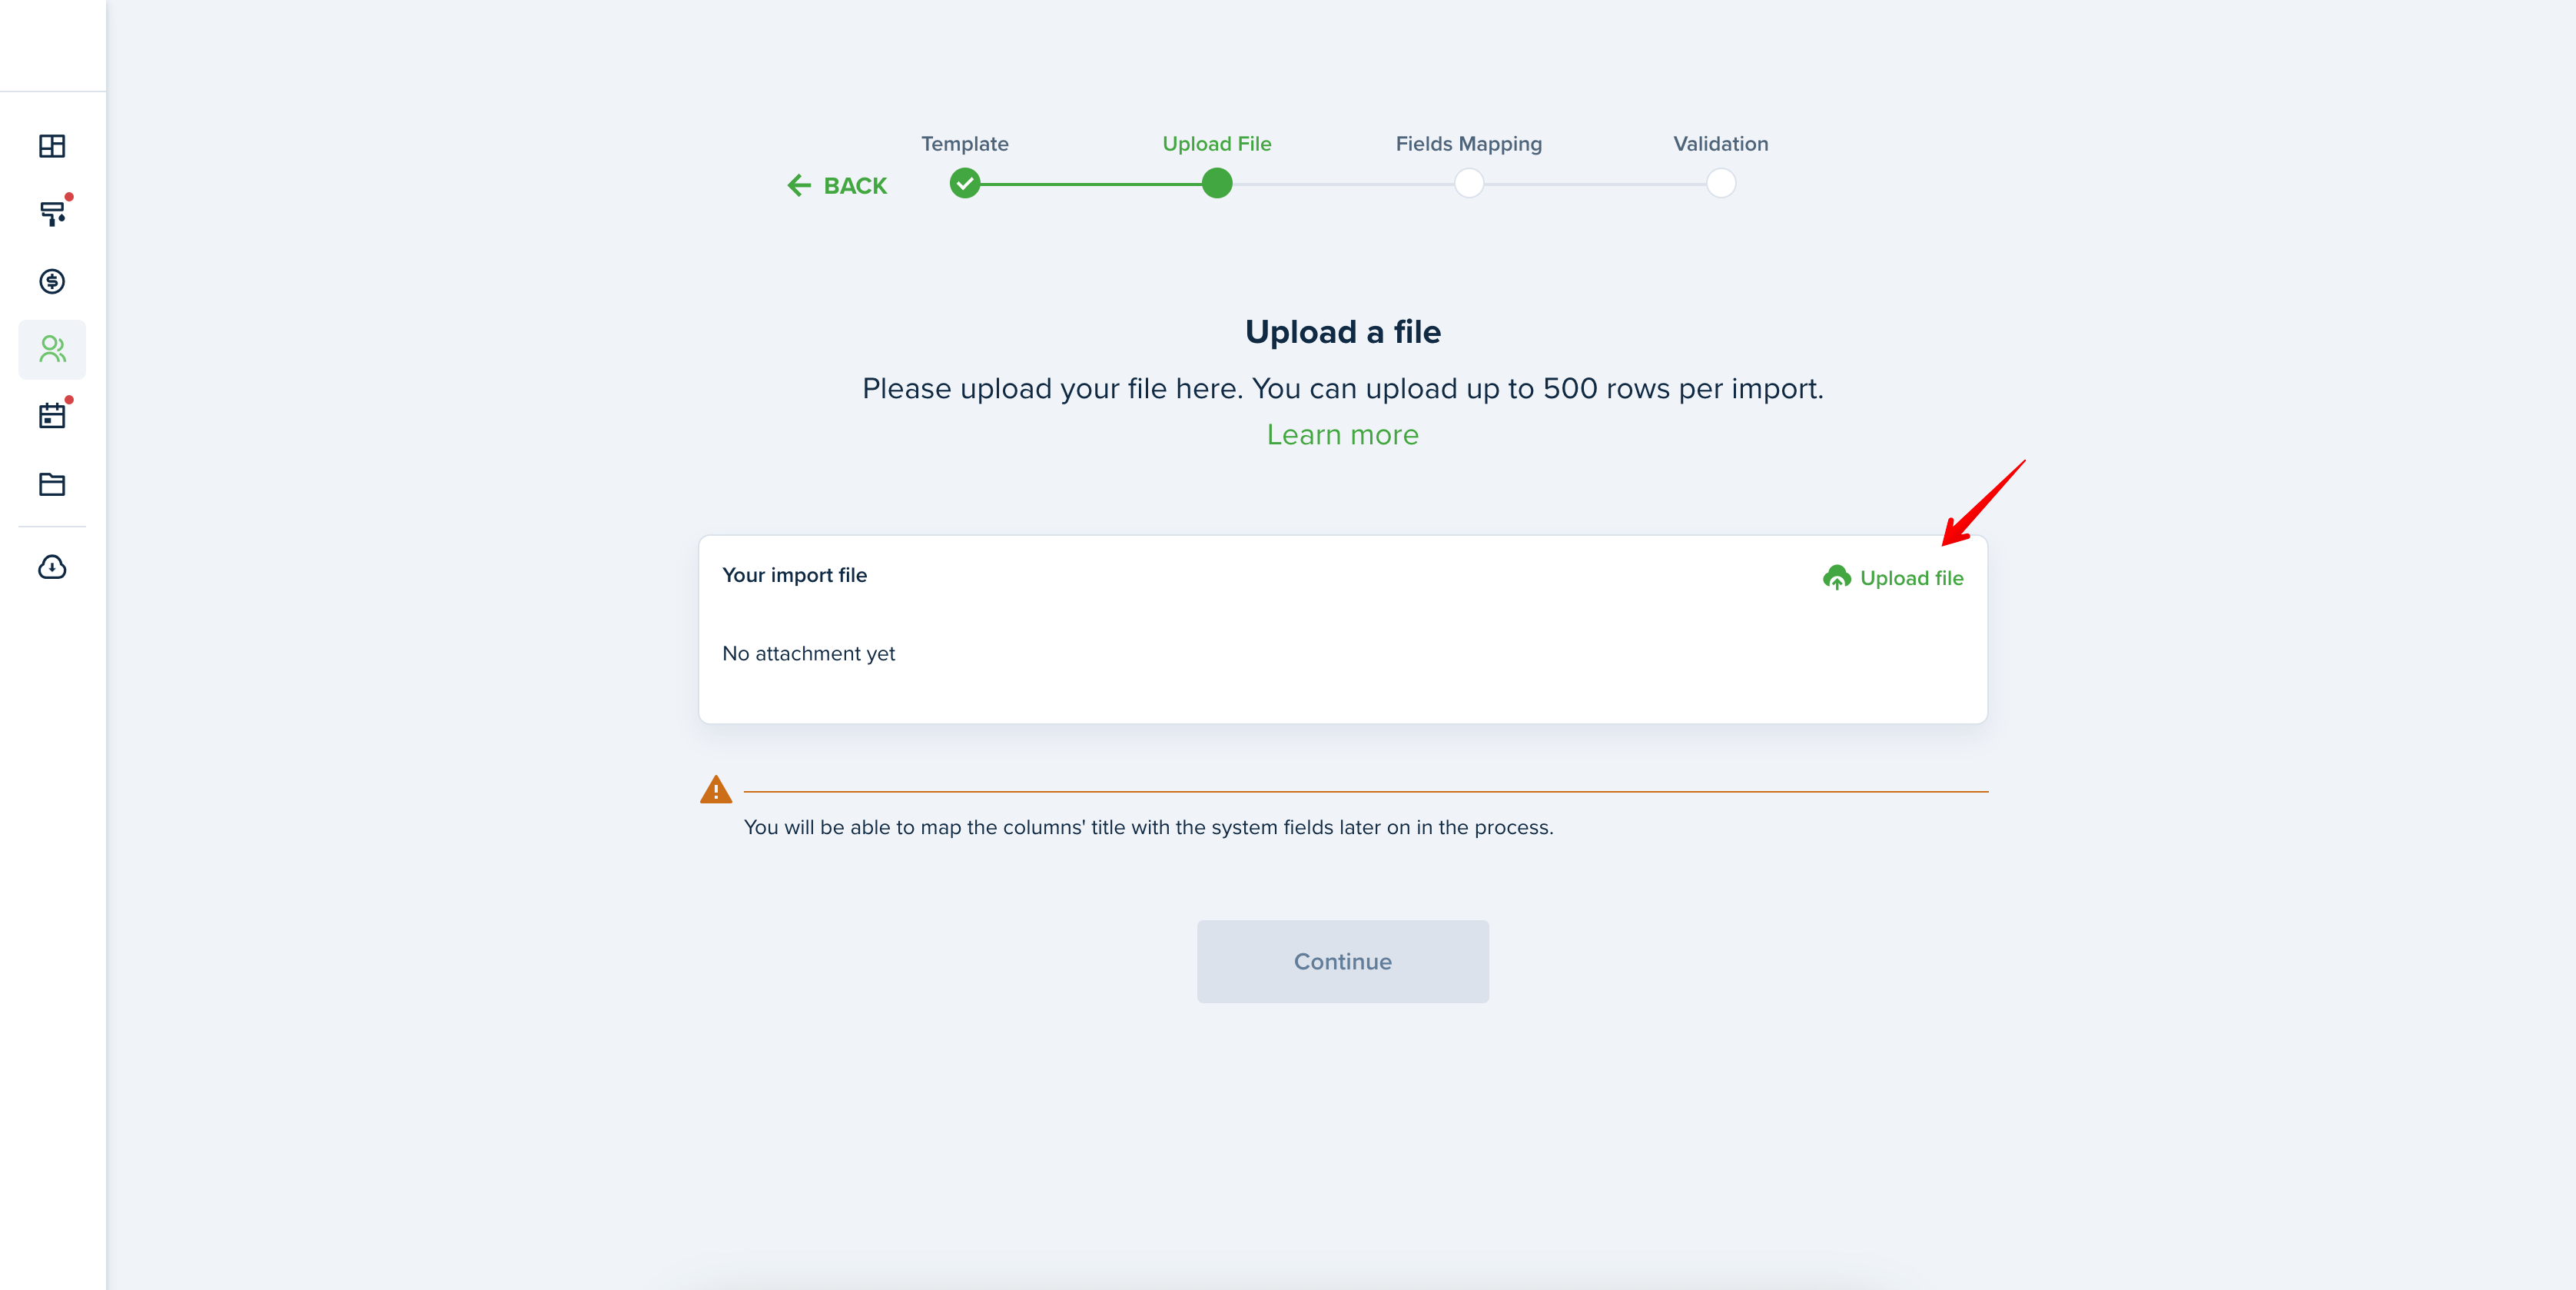
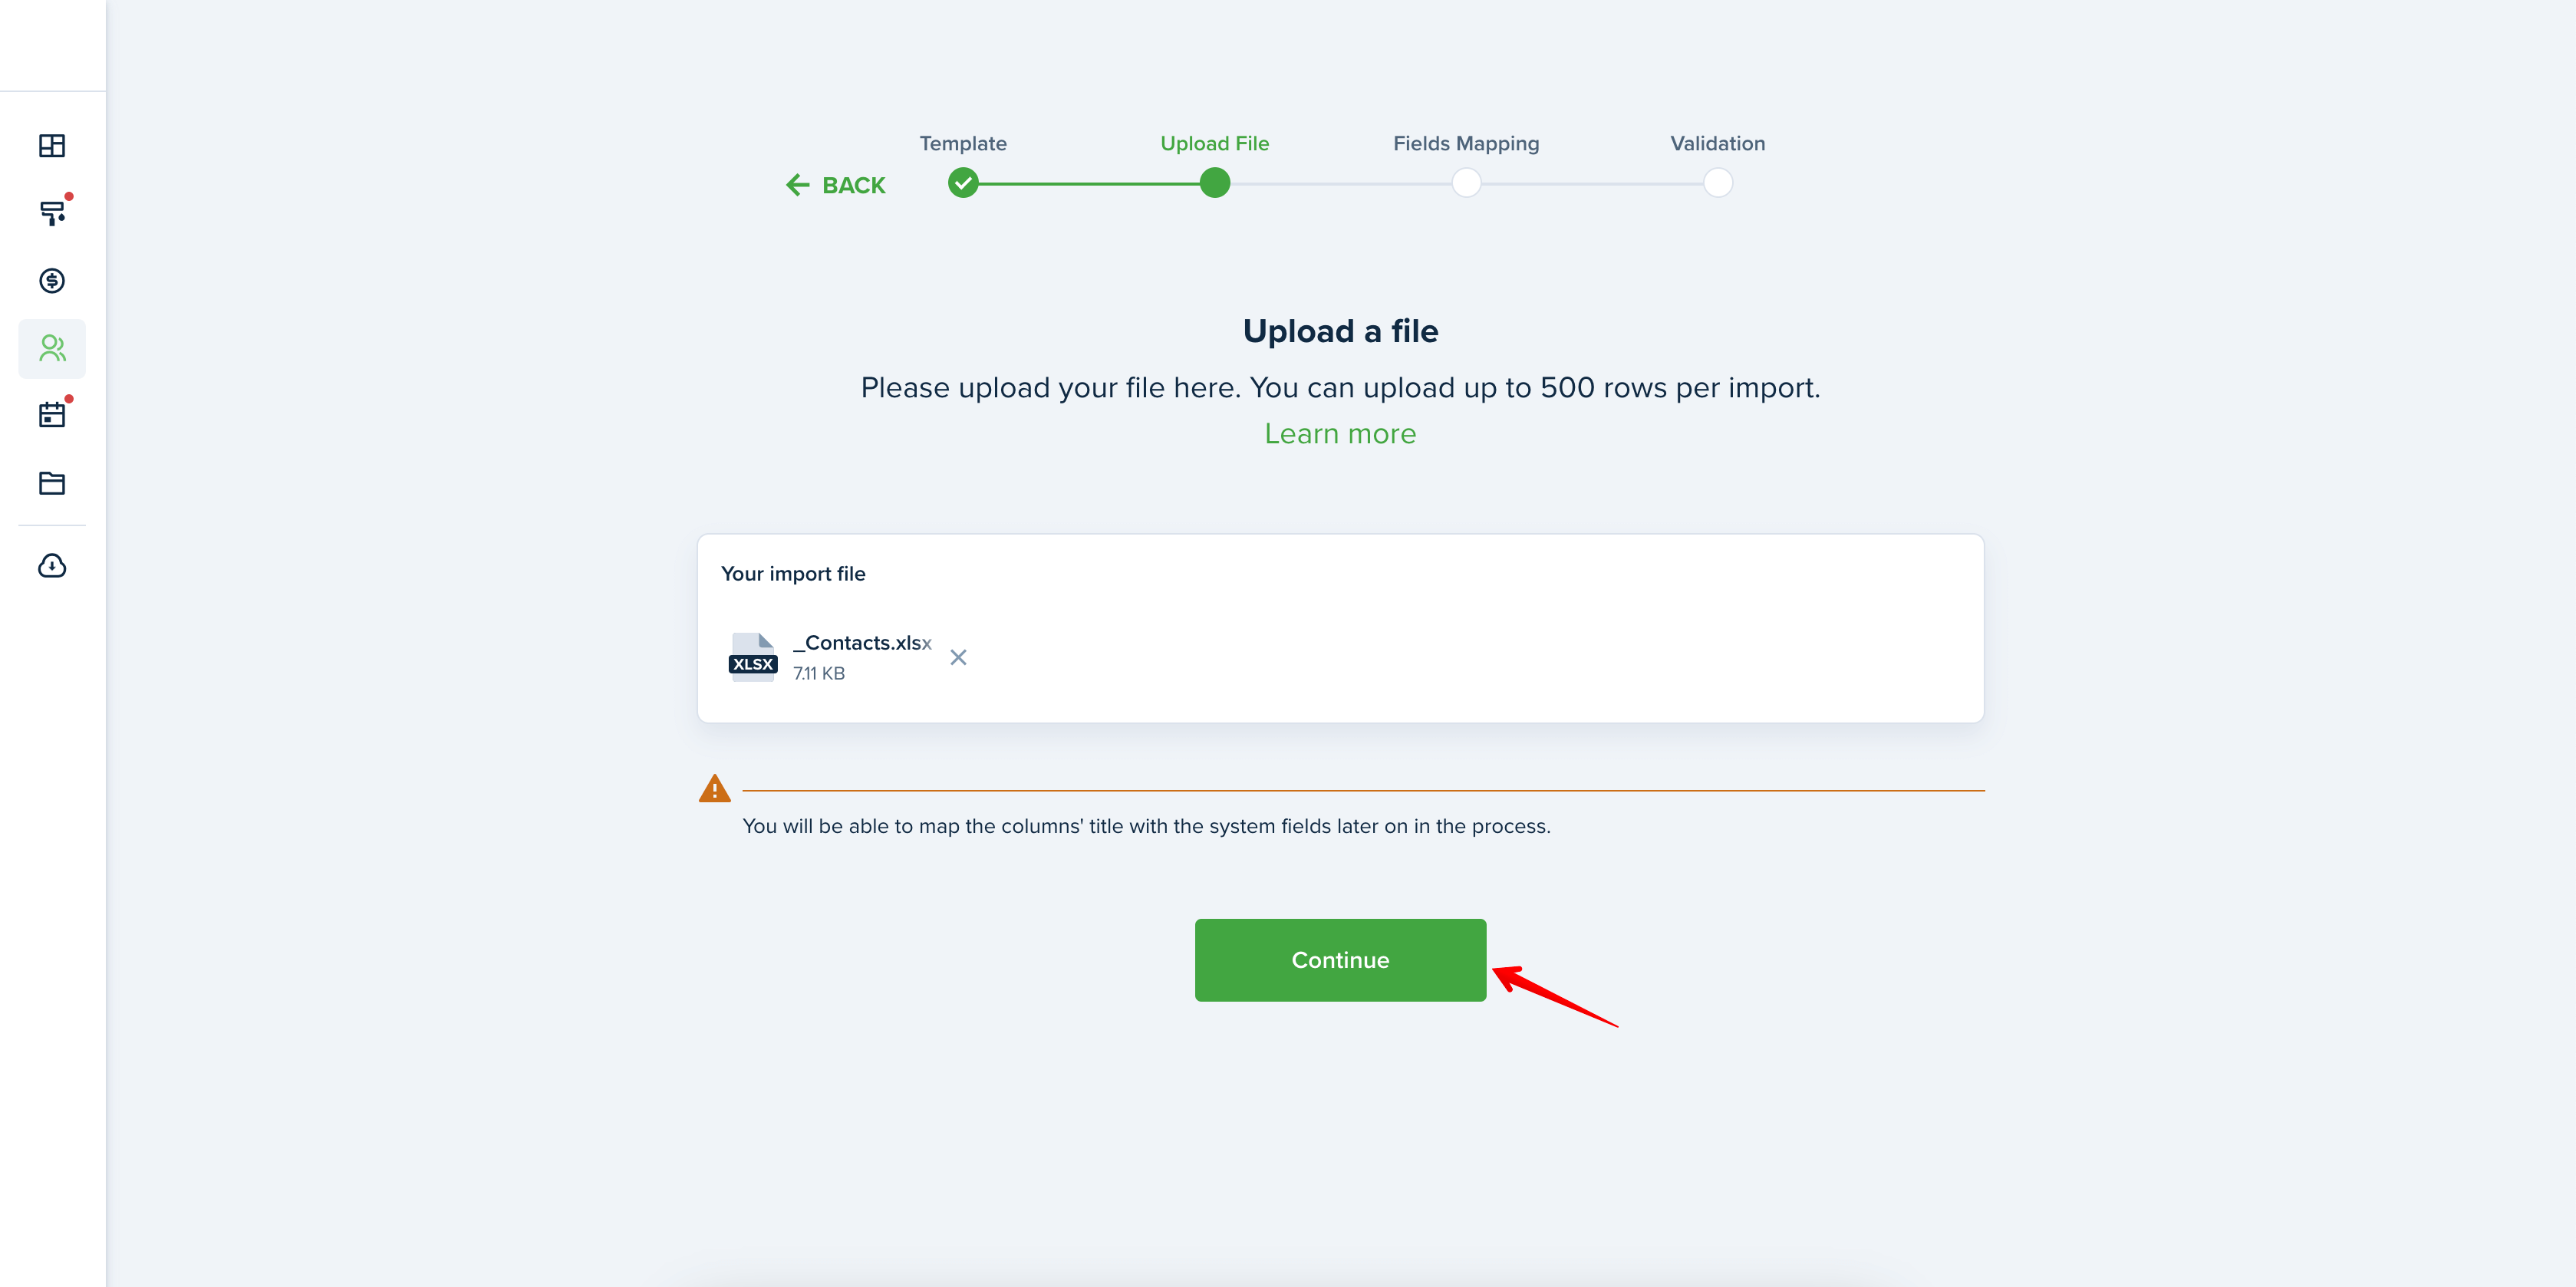
Save changes, return to the import page, and click the “I'm ready to import“ button. Click on “Upload file” to import the edited file sample. Once the template is loaded, click “Continue” to move to the next step:
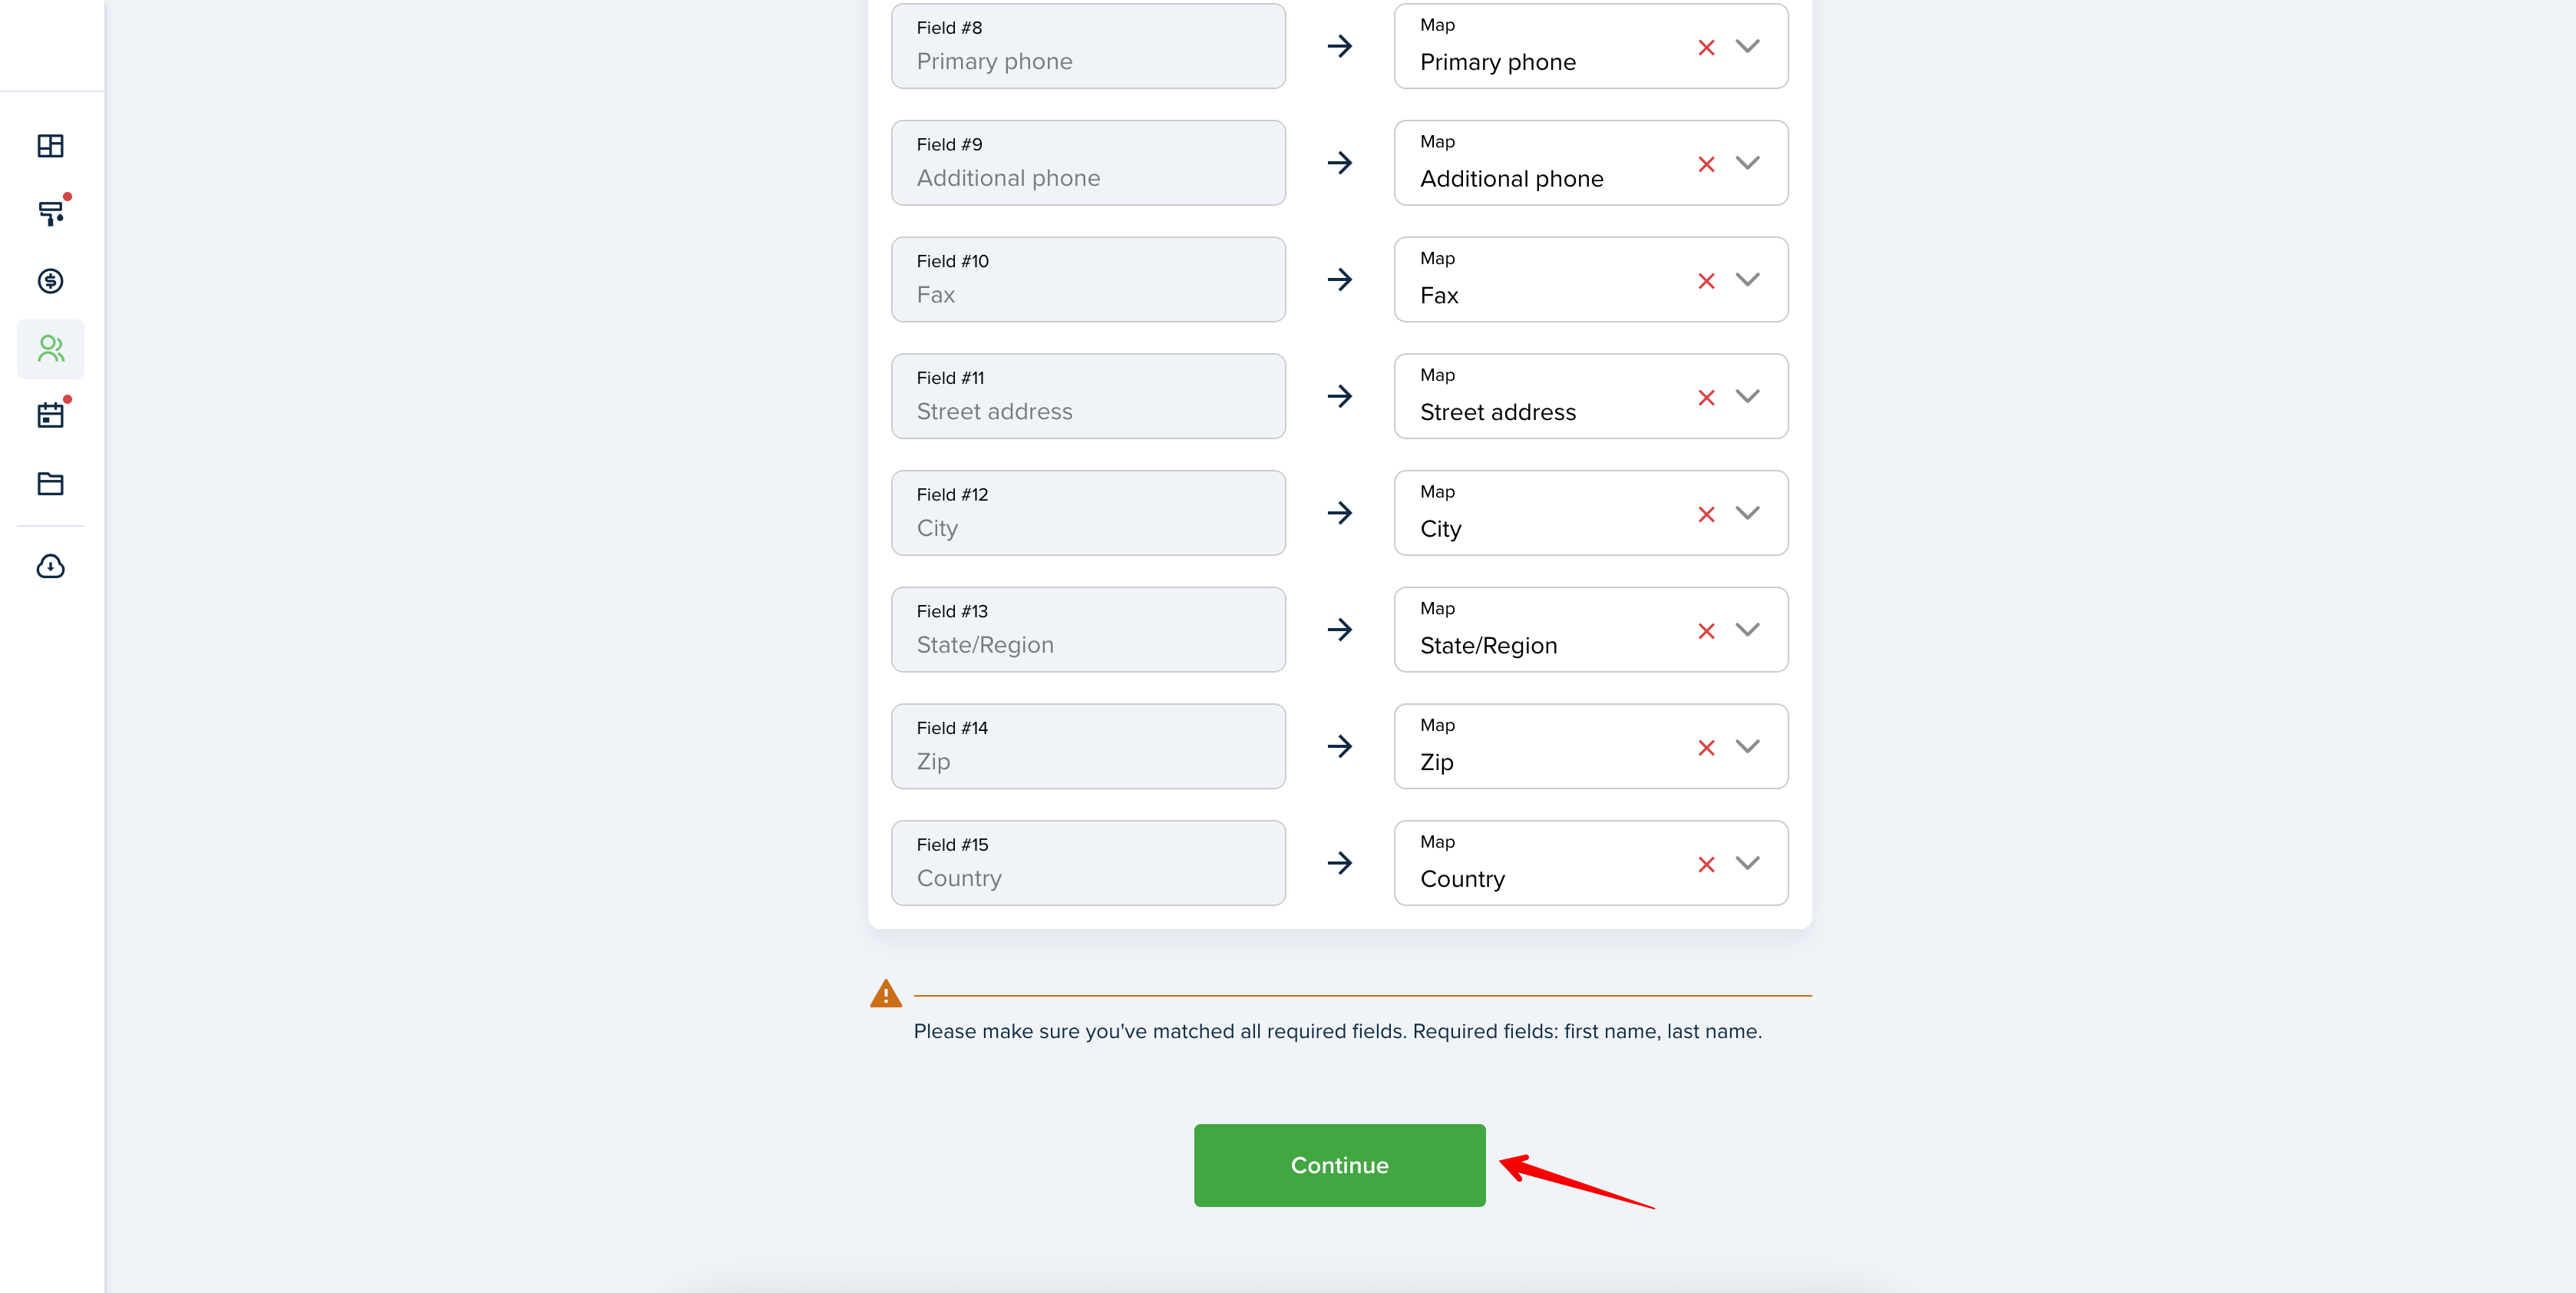
You will be asked to map the fields from your document with the system fields. Click “Continue” to proceed:
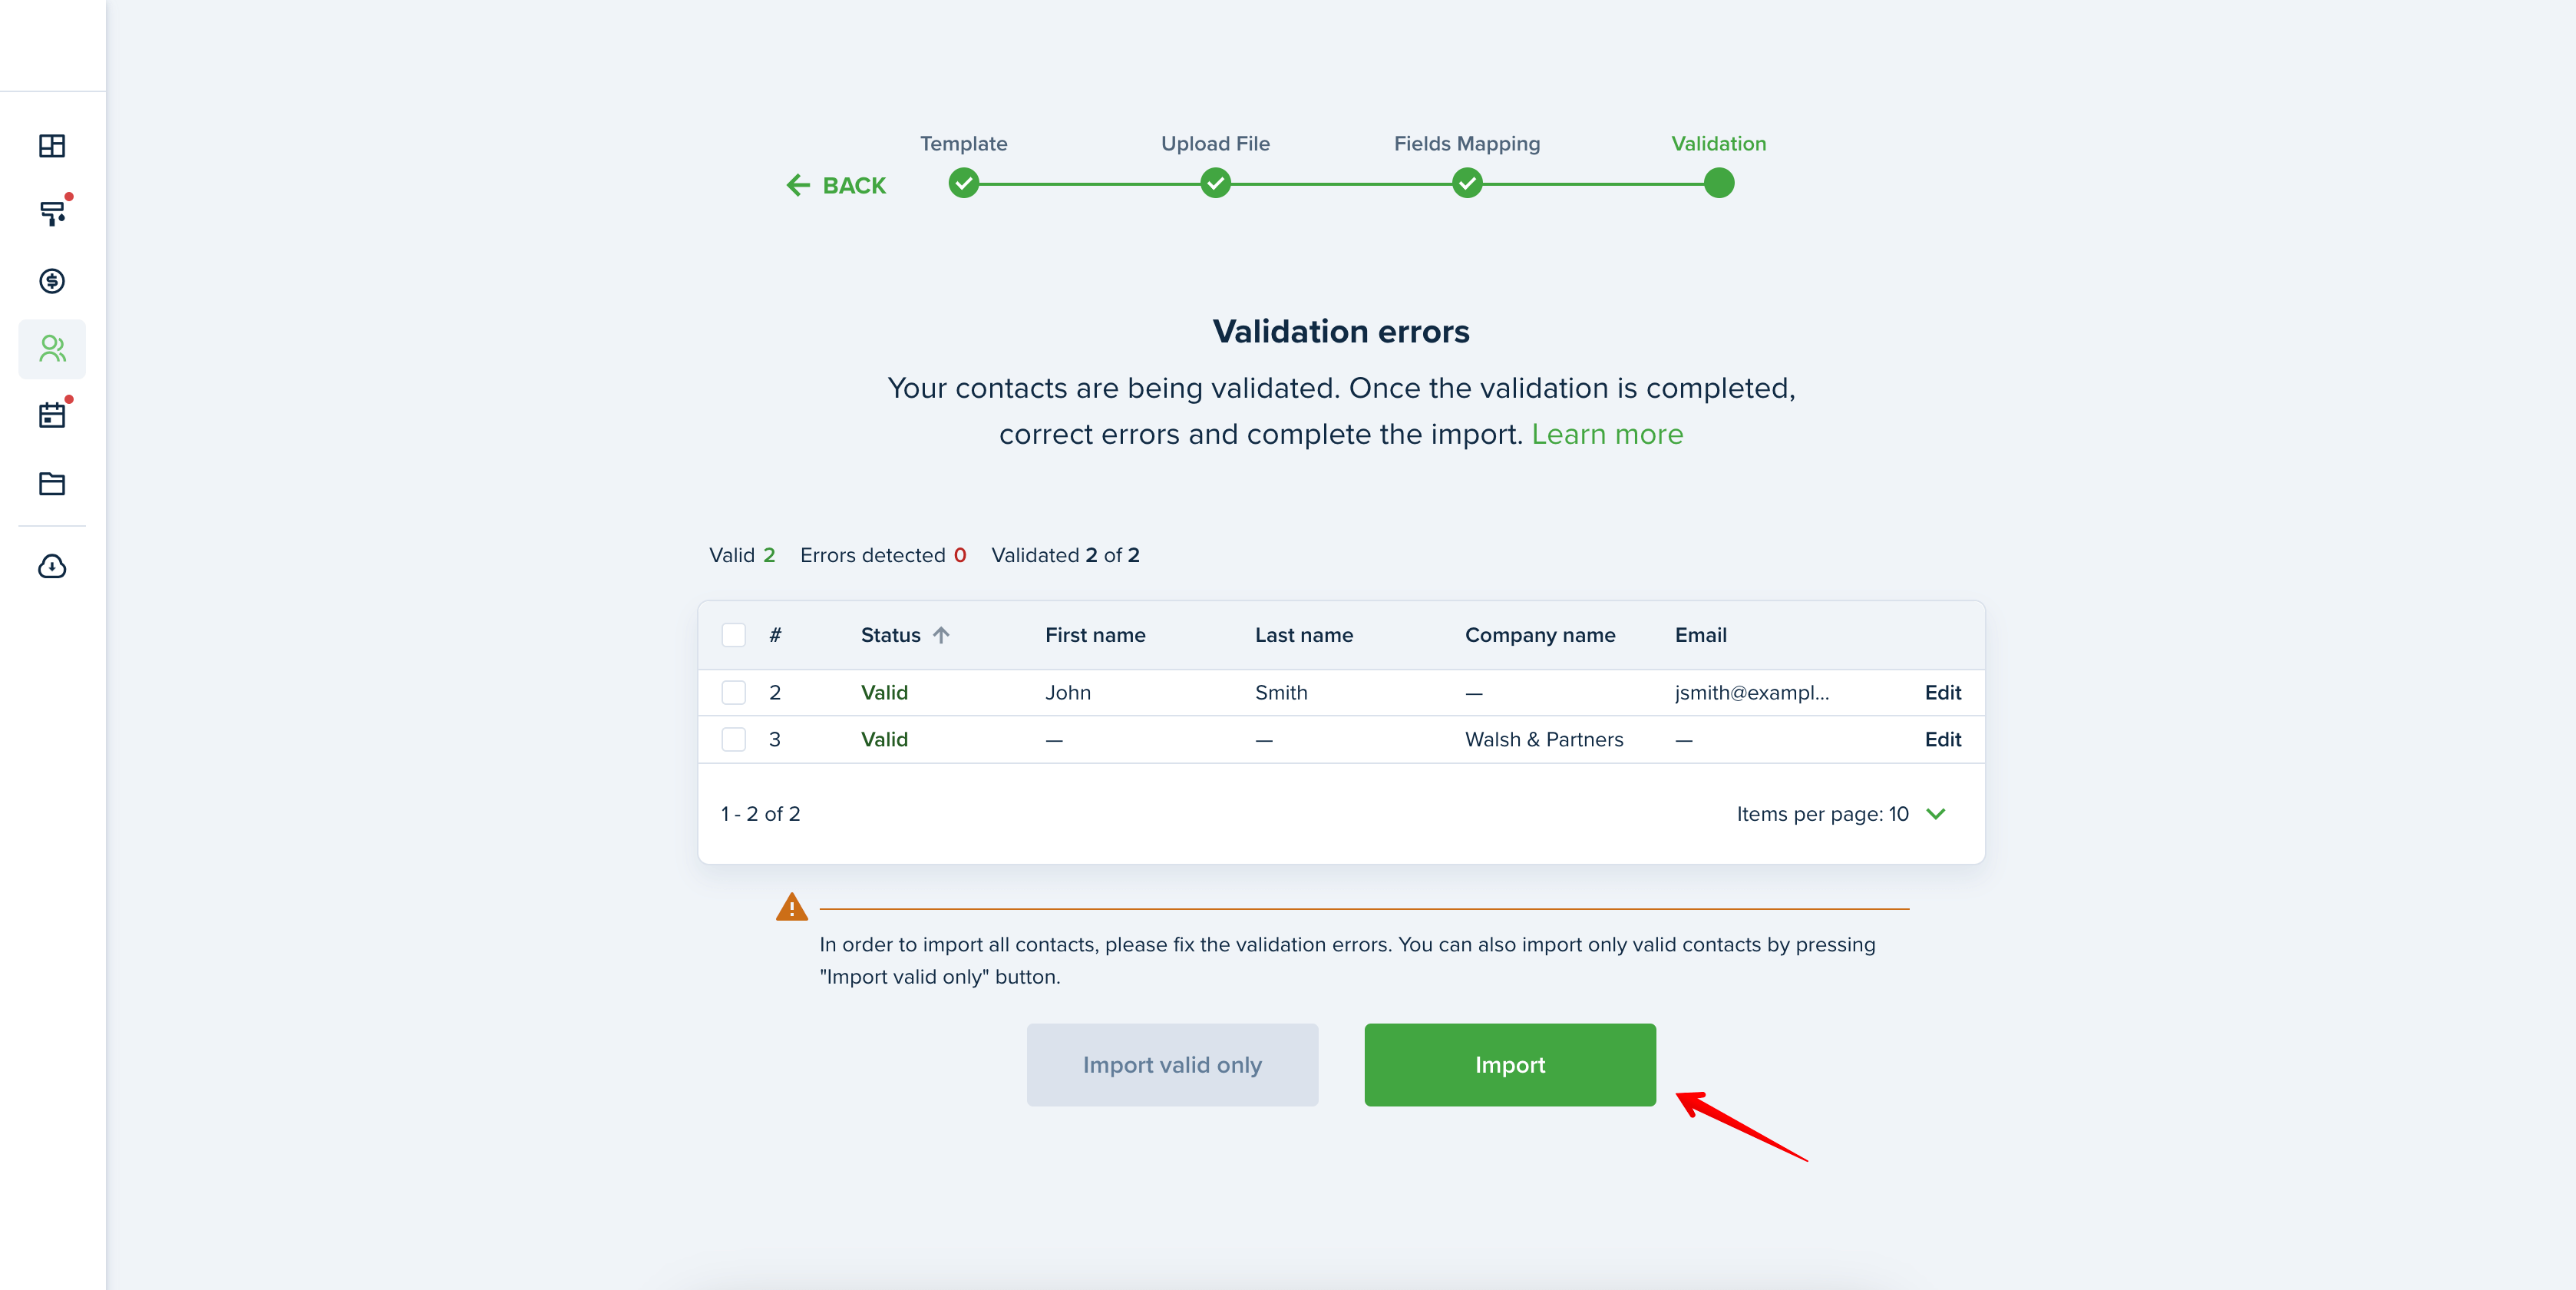
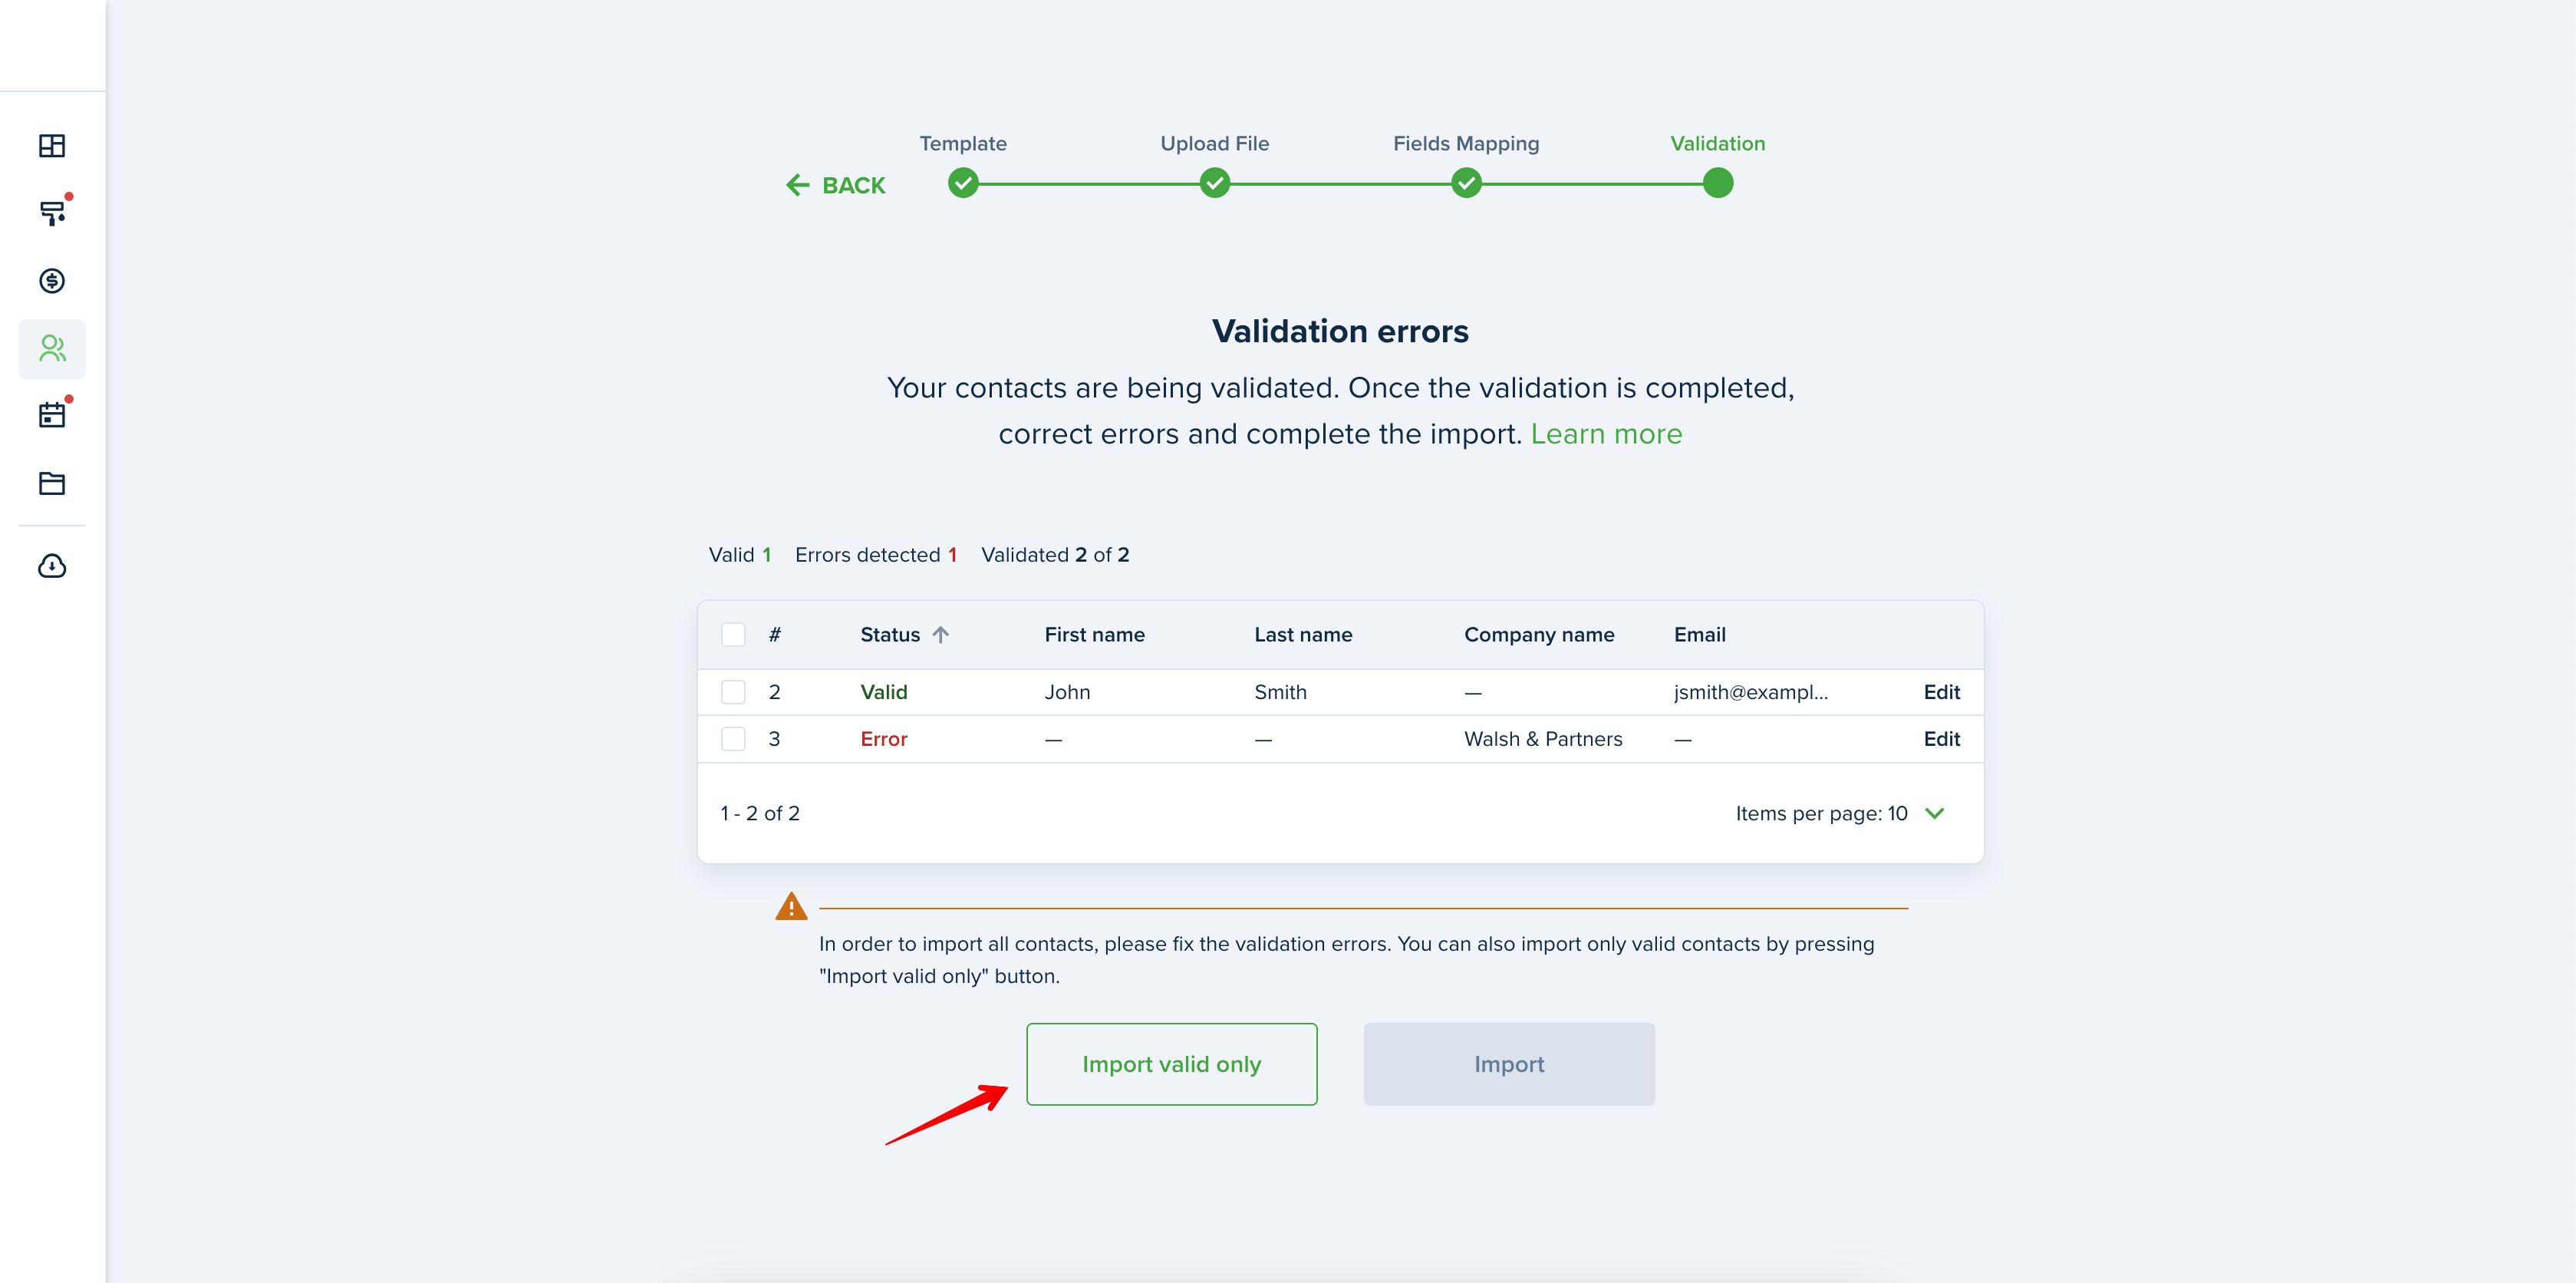
On the Validation step, you can see the contacts that were imported. The Valid Status indicates that the contact information passed the validation and is ready to be imported. The Error status means that some fields need to be corrected. To correct them, press the “Edit” button near the contact:
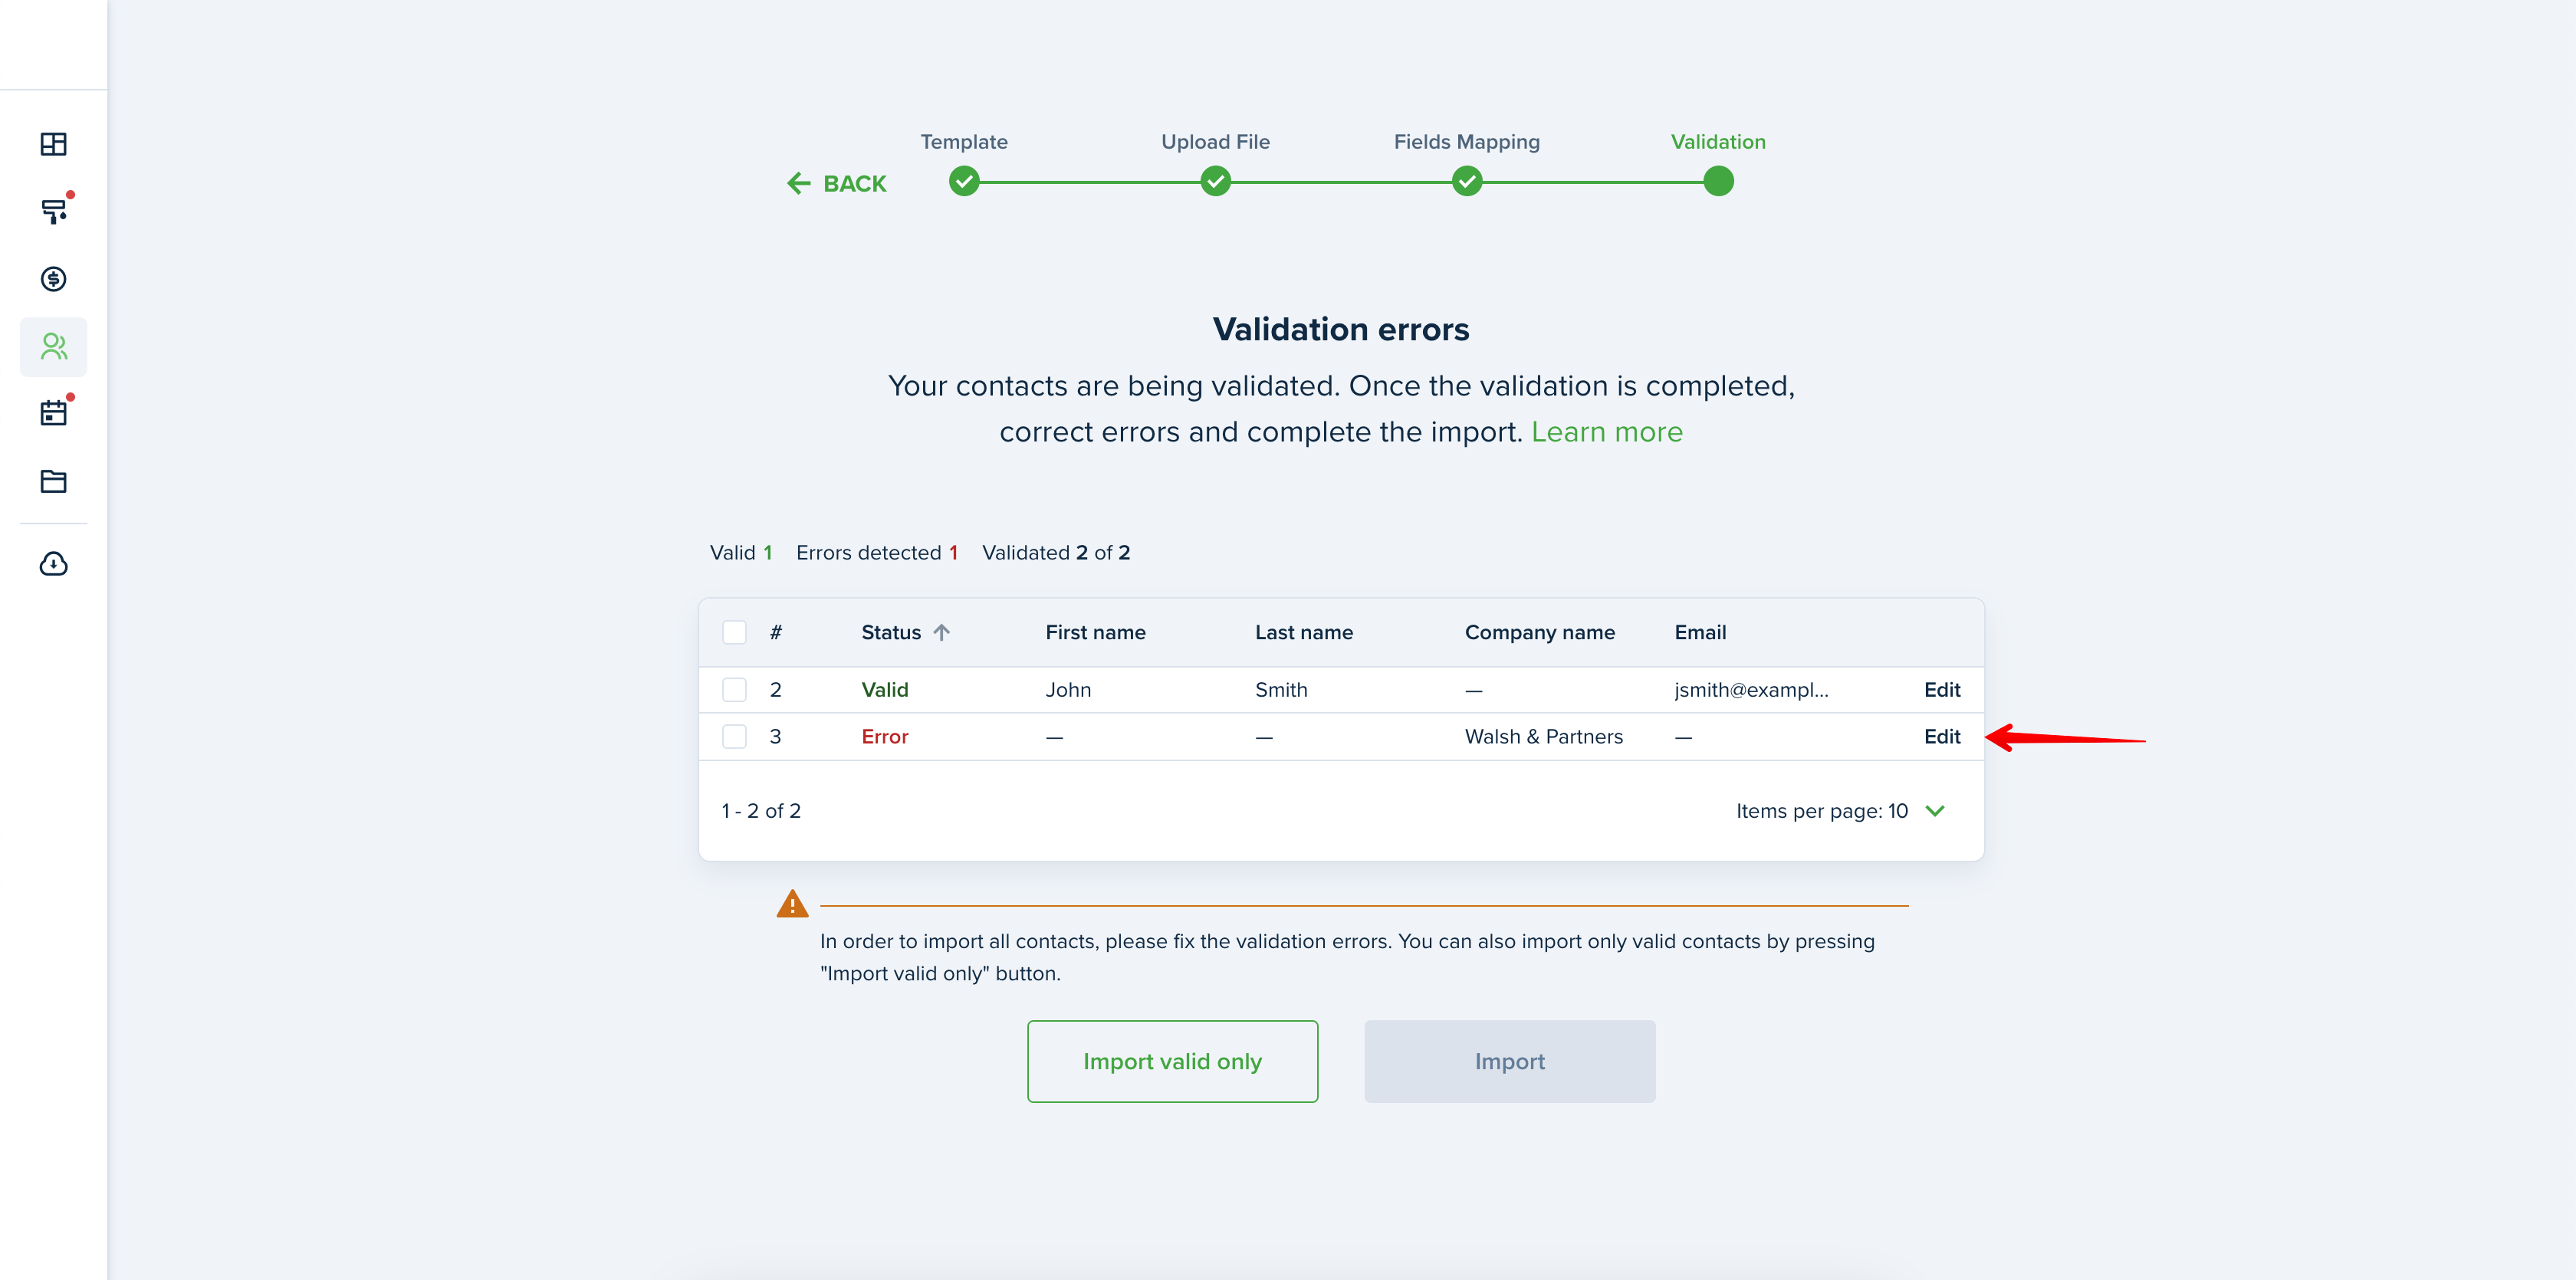
Once the information is corrected, you will be able to import the data. If the information is partially corrected, you can press the “Import valid only” button.
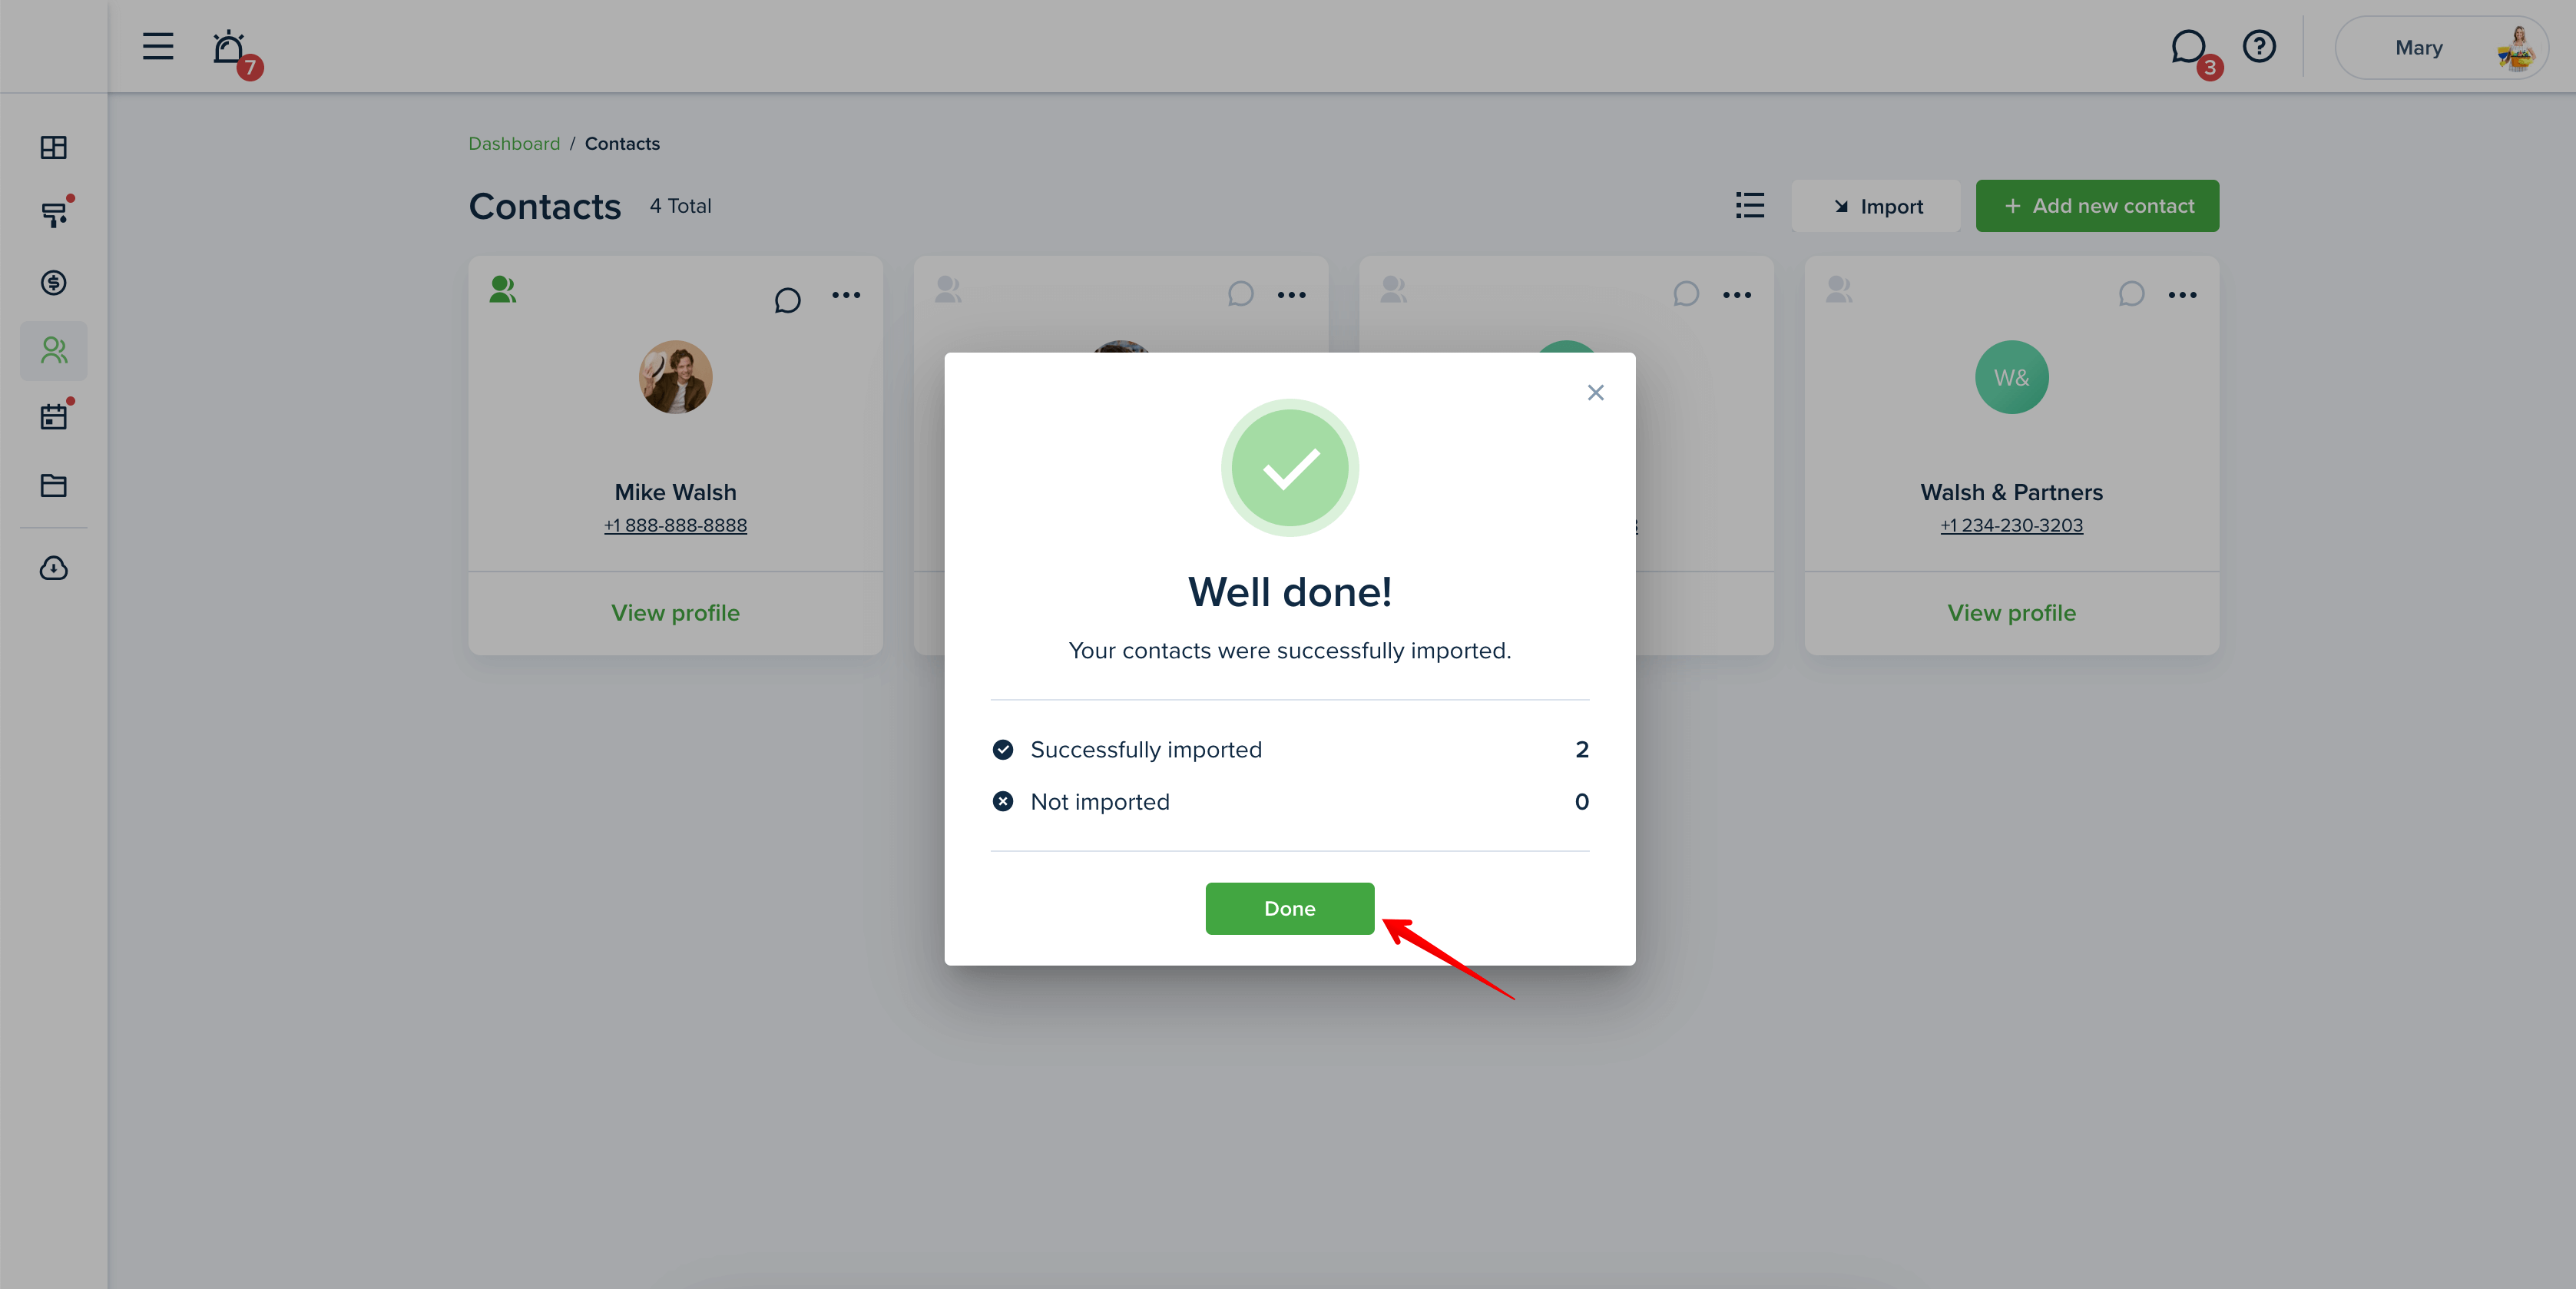
The “Well done!” page shows the number of contacts that were imported successfully or not. The list of contacts will be displayed in the “Contacts” menu right after it is imported. Depending on the number of imported data, it can take up to a few minutes.
Recommendation!
We strongly recommend using the provided template to ensure that imported information aligns with system validation. To prevent errors, try importing a few contacts first to verify if they are imported correctly. If not, you can quickly remove them and start over.
Last updated:
Apr. 12, 2024